A Step-By-Step Guide Showing How To Integrate DeBounce With Your Everyday Apps Using Zapier
With Zapier, you can link and configure several online services to function together. This online utility enables you to develop links (known as Zap) between over 1000 apps such as email service providers, spreadsheet apps, CRMs, and email list cleaner of DeBounce. In this way, your email verification process will become automatic. Every Zap consists of at least two stages; the first stage is called the Trigger while the second stage is referred to as the Action performed by the trigger.
Ideally, the occurrence of any event in-app A will lead to the performance of a series of actions in app B. By using Zapier, you will be able to confirm email addresses in real-time through DeBounce.
We have developed this article to show you the processes involved in the creation of a Zap between DeBounce and Google Sheets, as well as verification of emails with the use of Zapier. With the online utility, we aim to achieve three things: firstly, to pull in every new email address from the spreadsheet; secondly, use our email list cleaner to verify the new emails; and thirdly, to return the verification outcomes from DeBounce into the spreadsheet.
Take note that some considerable differences might be seen while creating links with other apps. However, since Zapier has excellent flexibility with great features, you may tailor the verification flow according to your needs.
Using DeBounce With Zapier: Here Is What You Need
- A Zapier account: create an account and sign up for free – this usually has limited features. Herein, we will be creating a Zap that works with a free Zapier account.
- A DeBounce account (with the API key): In your DeBounce account, check your API section to generate an API key.
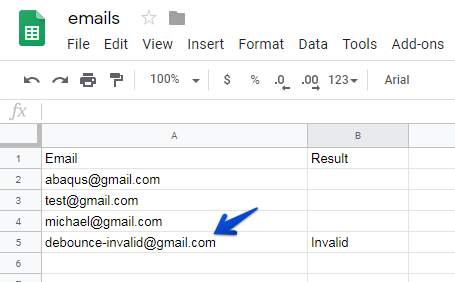
- A Google account: A Google account and spreadsheet in Google Drive will be needed specifically for our Zap. Before you begin, it is necessary to set the following columns with headers;
- Email column – this is the source where Zapier will get your emails from.
- Result column – DeBounce validation results.
Now, let’s proceed to the step-by-step guide of generating a Zap between DeBounce and Google Sheets.
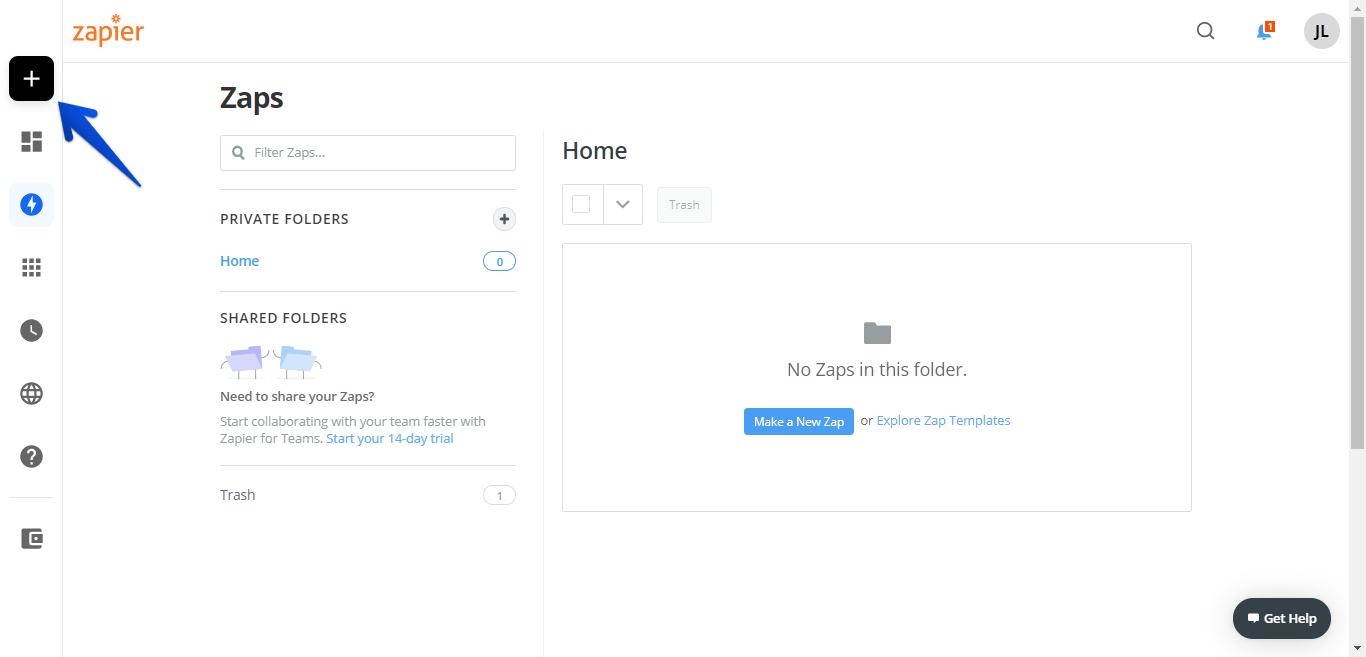
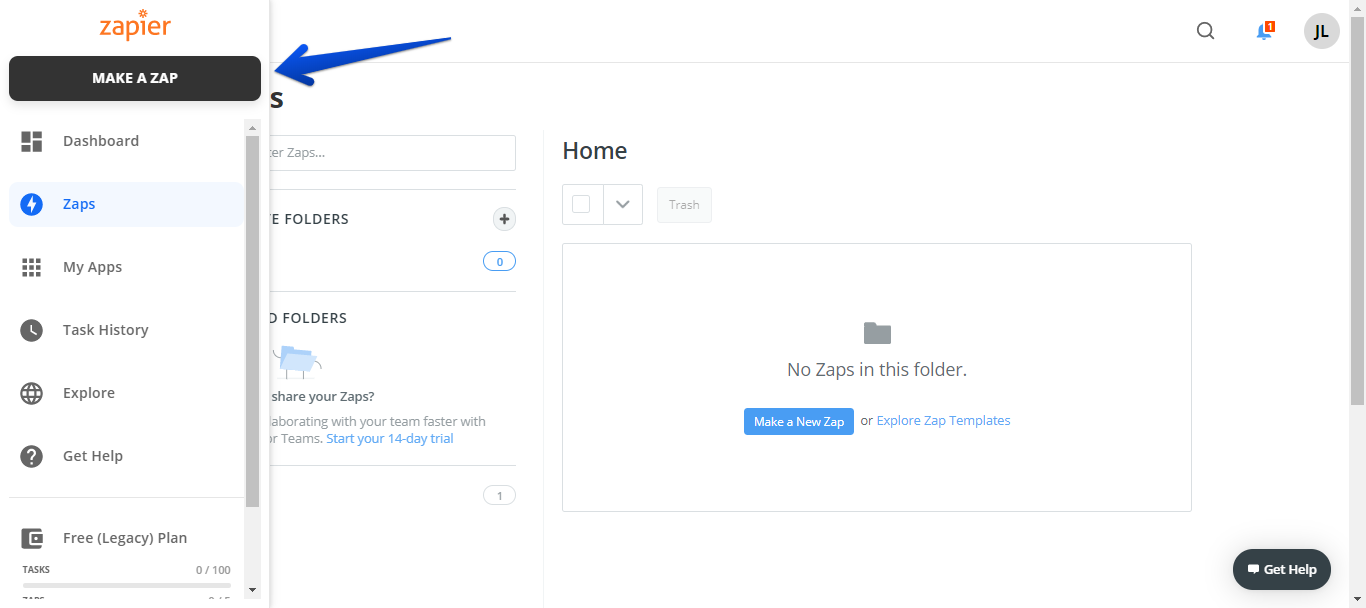
Step 1: Open your Zapier account and log in. At the top-left of the page, tap “+” icon. and then tap “MAKE A ZAP”.
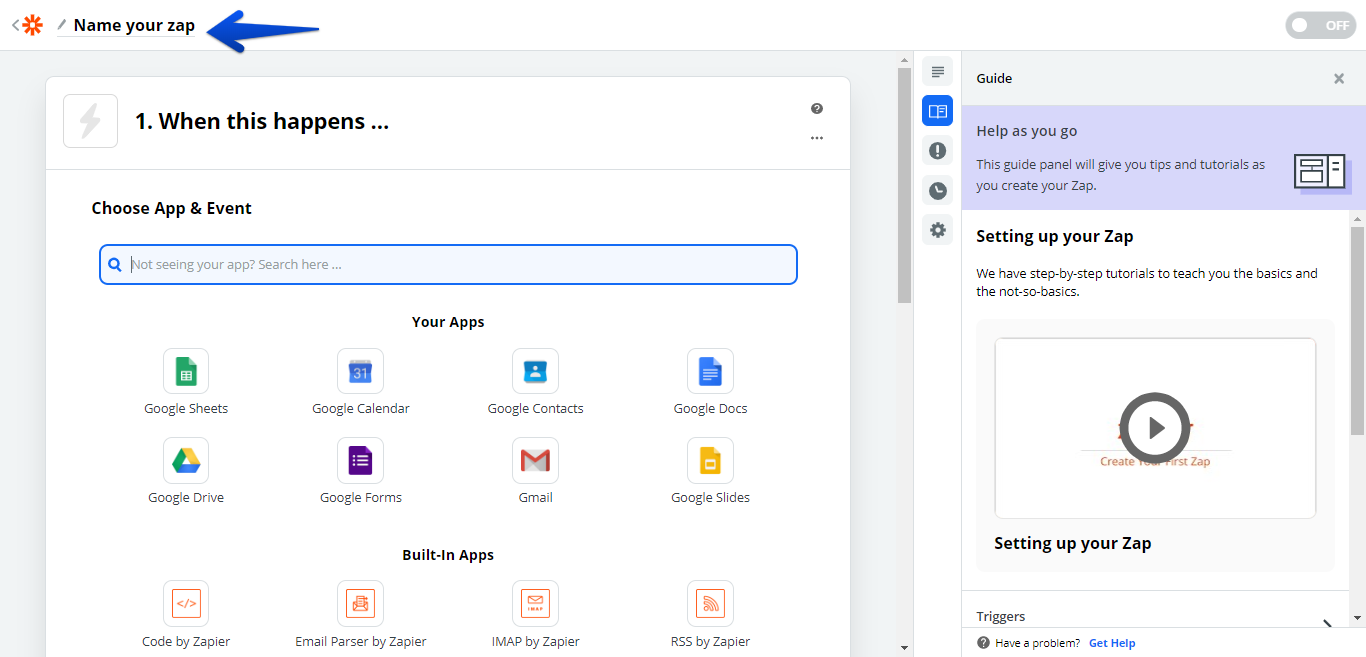
 Step 2: If you like, you may give a name to your Zap. To add a name, click on “Name your Zap.”
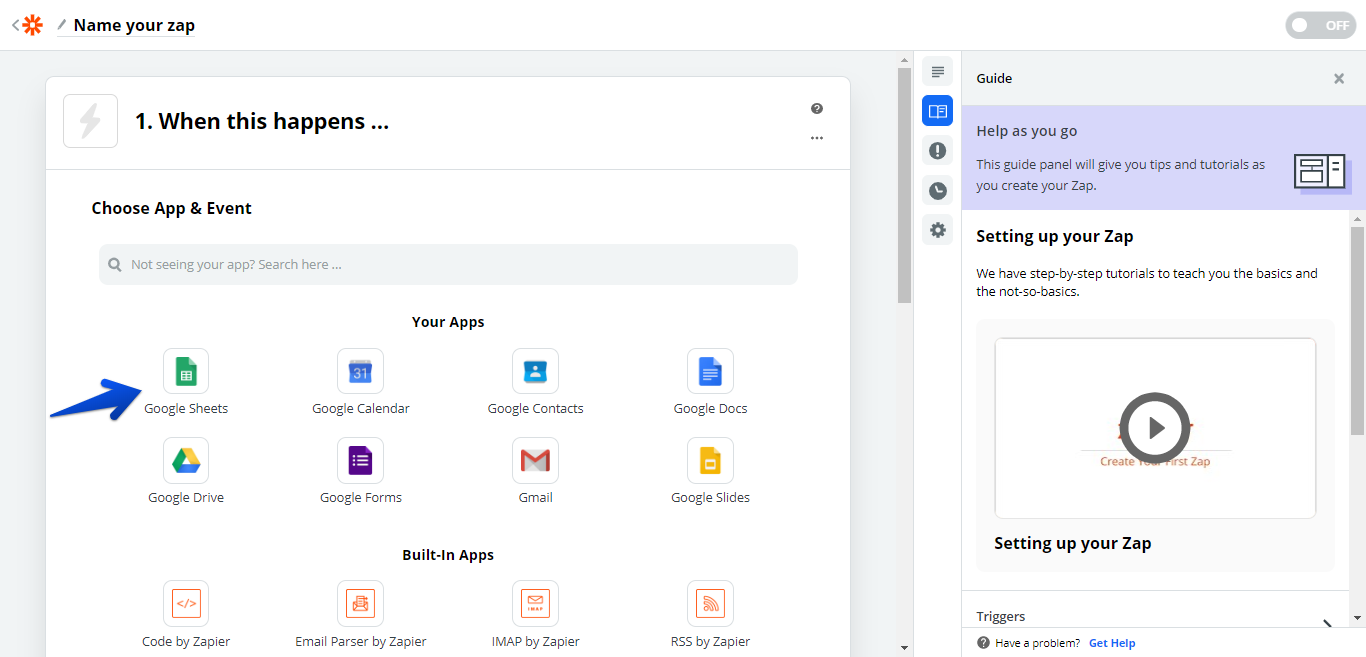
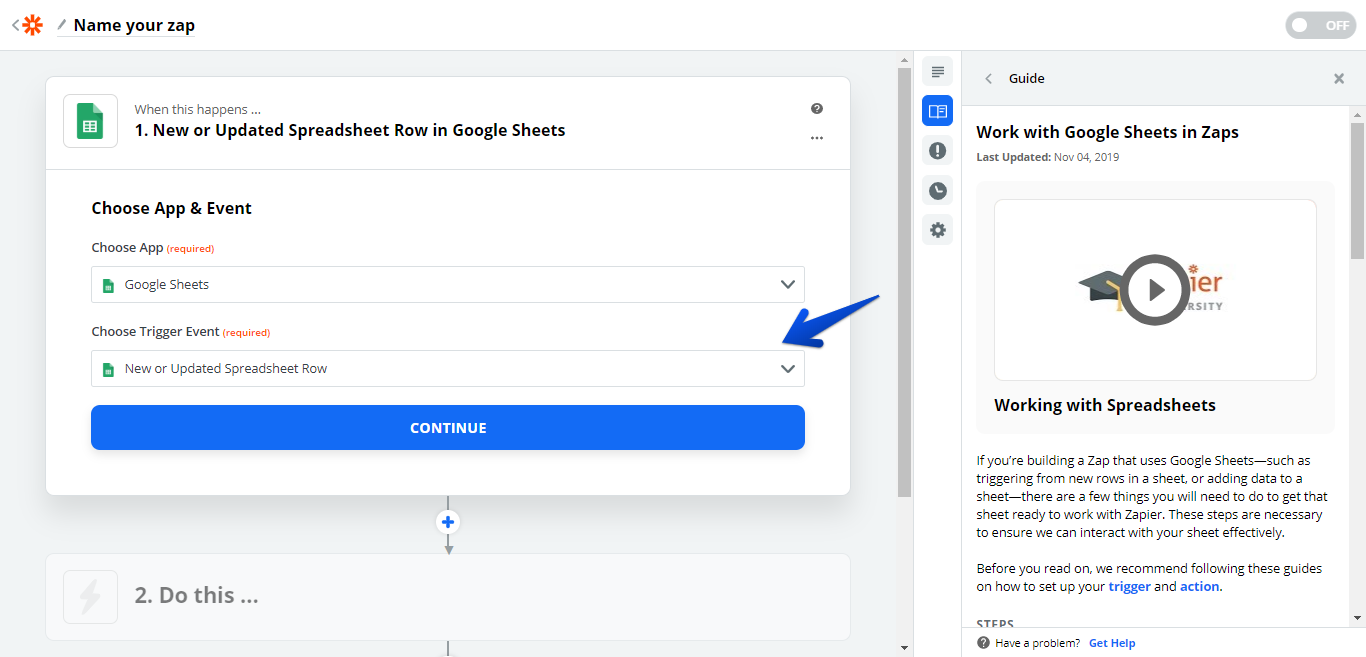
Step 3: Now, we will establish the Trigger, and Google Sheets will do the execution. On the “Choose app & event” section click on “Google Sheets”. If not, in the “Search Hundreds of apps” field, type Google Sheets. Once the app comes up on the list, select it.
Step 4: The next thing is to inform the app about what we will like to trigger. Here, we aim to make the app trigger the Action whenever the spreadsheet is updated. Hence, select New or Updated Spreadsheet Row, then tap “Continue.”
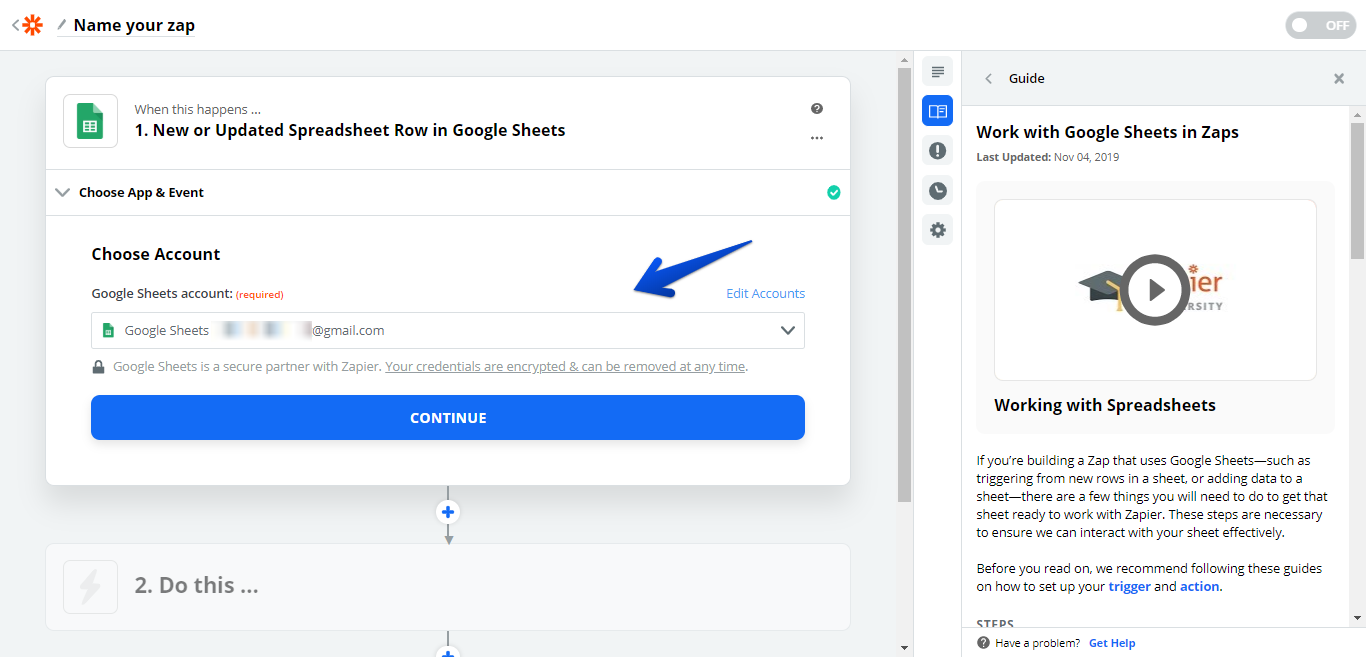
 Step 5: Tap “Choose Account.” Type in the necessary details of your Google account. Afterward, allow Zapier to access your Google Sheets.
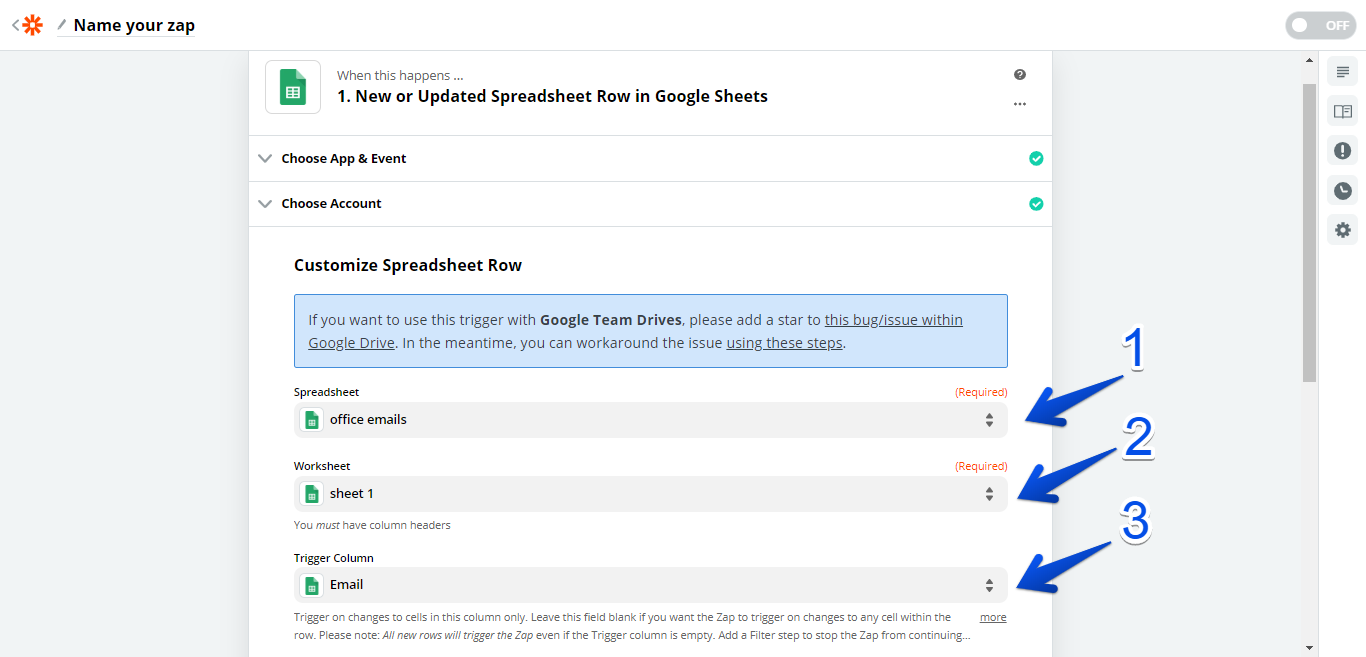
Step 6: Choose the specific spreadsheet file which you want to link. Select the drop-down icon beside the spreadsheet space, then click on the preferred spreadsheet. The system will display all the spreadsheet files which you have stored in Google Drive automatically. Afterward, choose the worksheet which you want the system to access, using the same process. Now, in your spreadsheet, choose the column which consists of the email addresses – check under the Trigger column. Then, tap “Continue.”
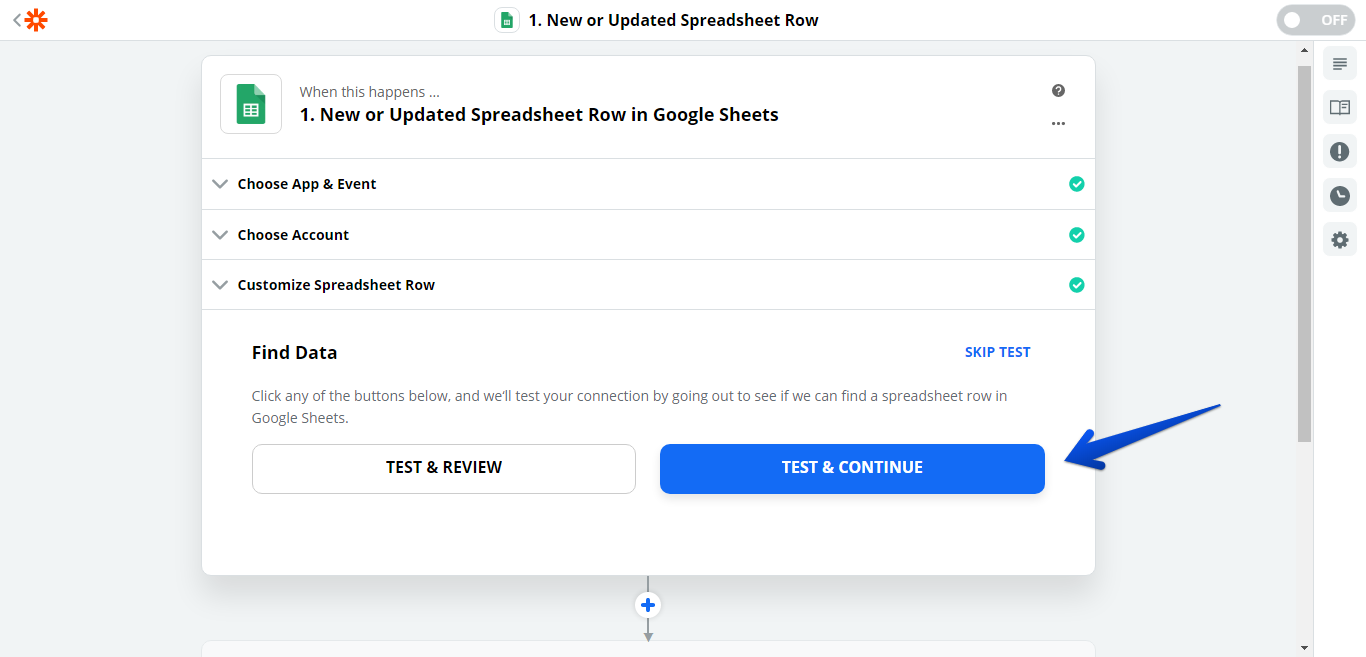
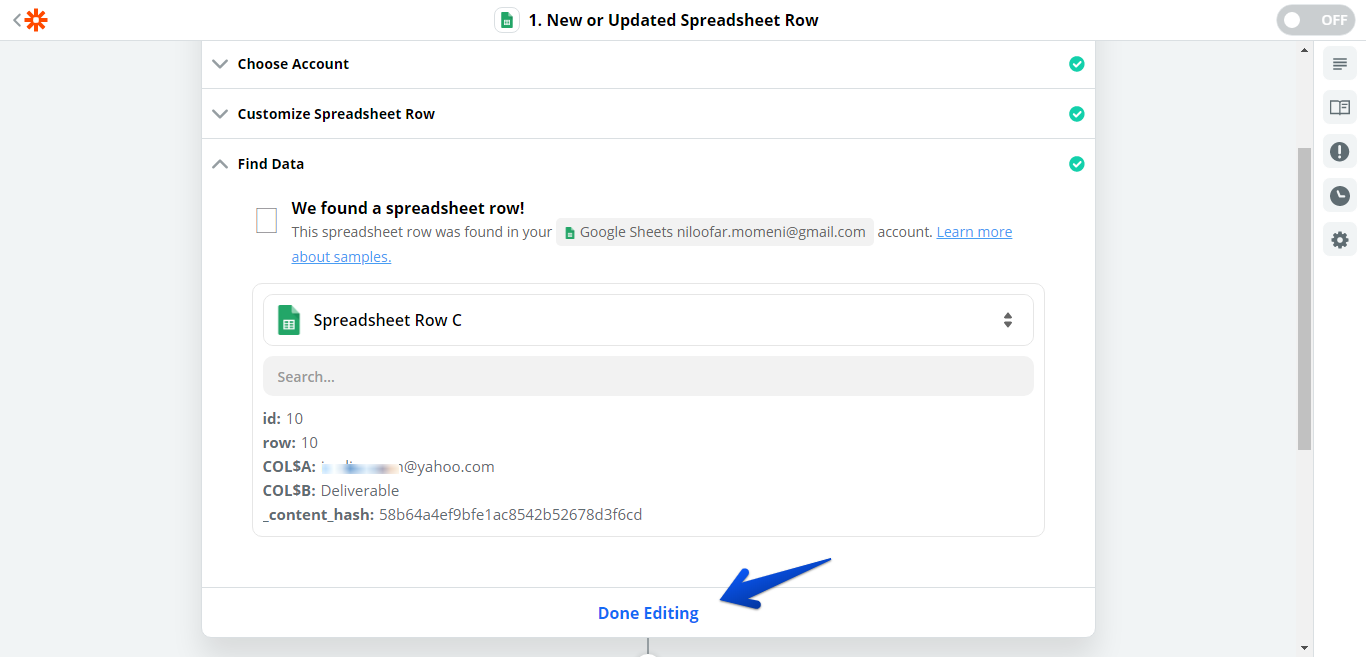
Step 7: On Find Data section, click on “TEST & CONTINUE”. A summary of the trigger setup will be displayed. Peruse the details to see if everything is correct. Then, click “Done Editing.” Action section will pop up if every detail is in order. Otherwise, an error message will be displayed. In such a case, recheck the settings from the past steps, make the necessary corrections, then perform the test again. Now that the setup is correct, choose “Continue.”
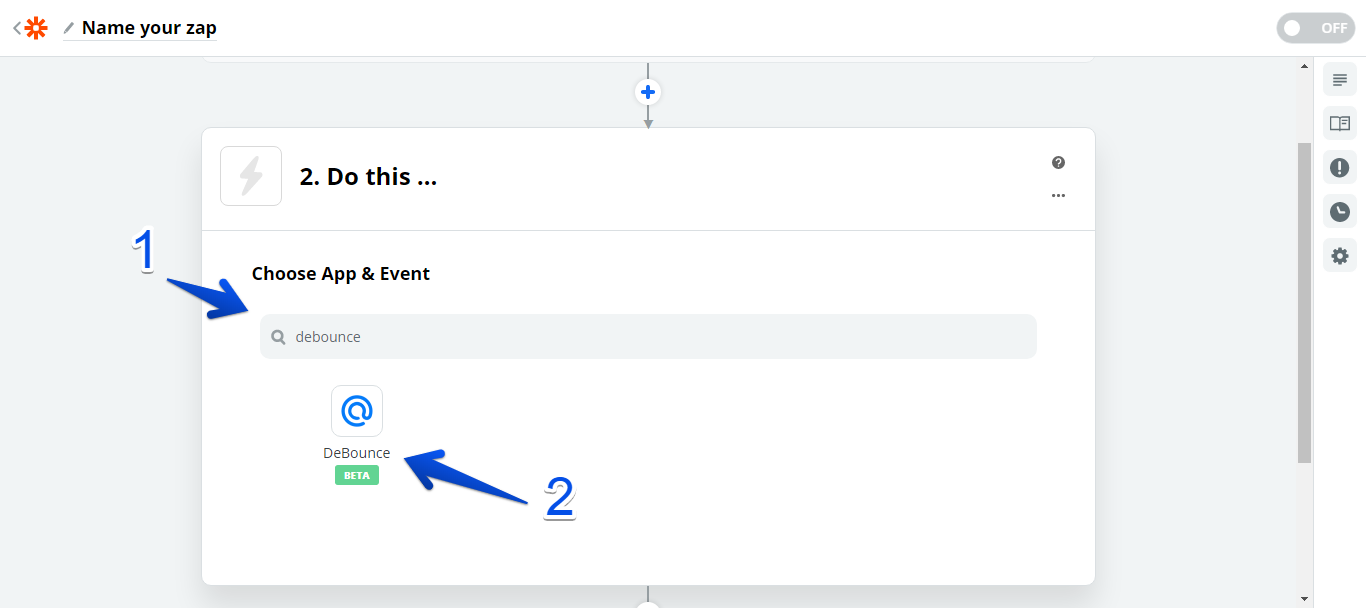
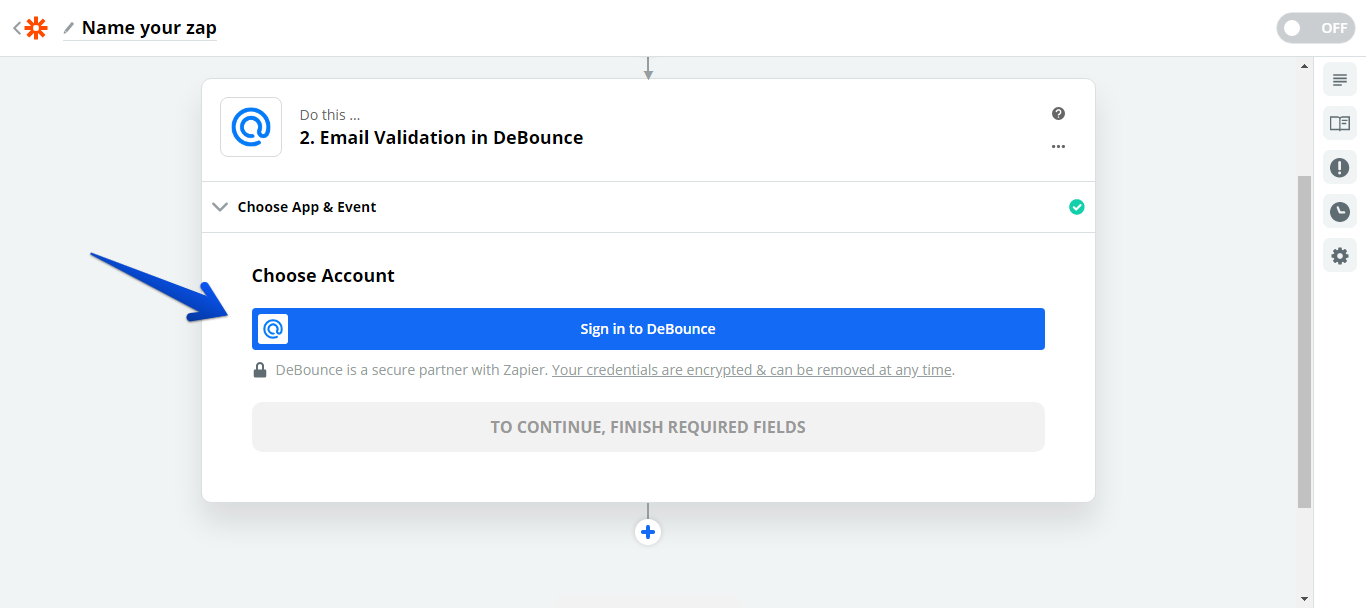
Step 8: It is time to establish the Action. At this stage, the system is aware of the spreadsheet to access and where to check changes or new additions. So, you only need to inform the system about the action to perform with the new or updated information which it discovers. In “Choose App & App” section, search for “denounce”. You will need to choose “DeBounce.”
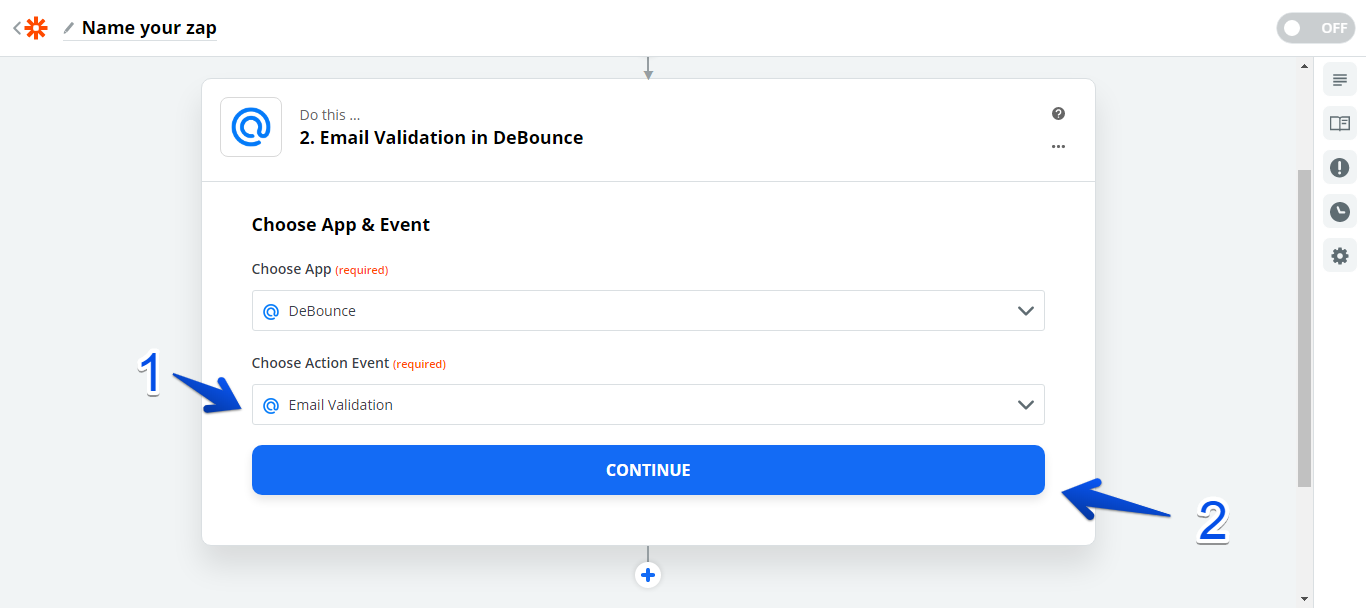
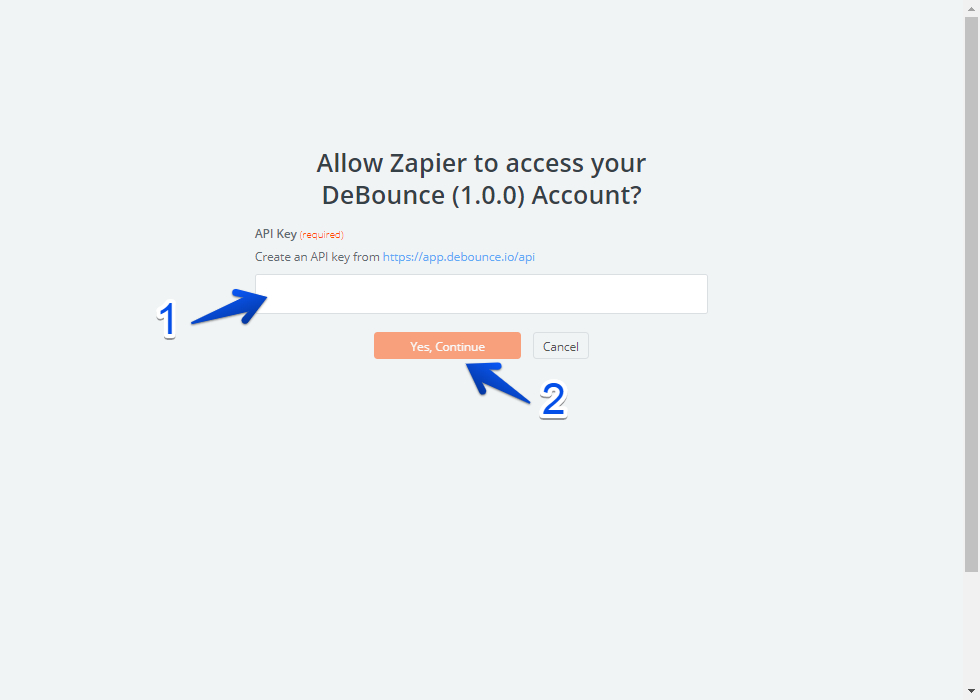
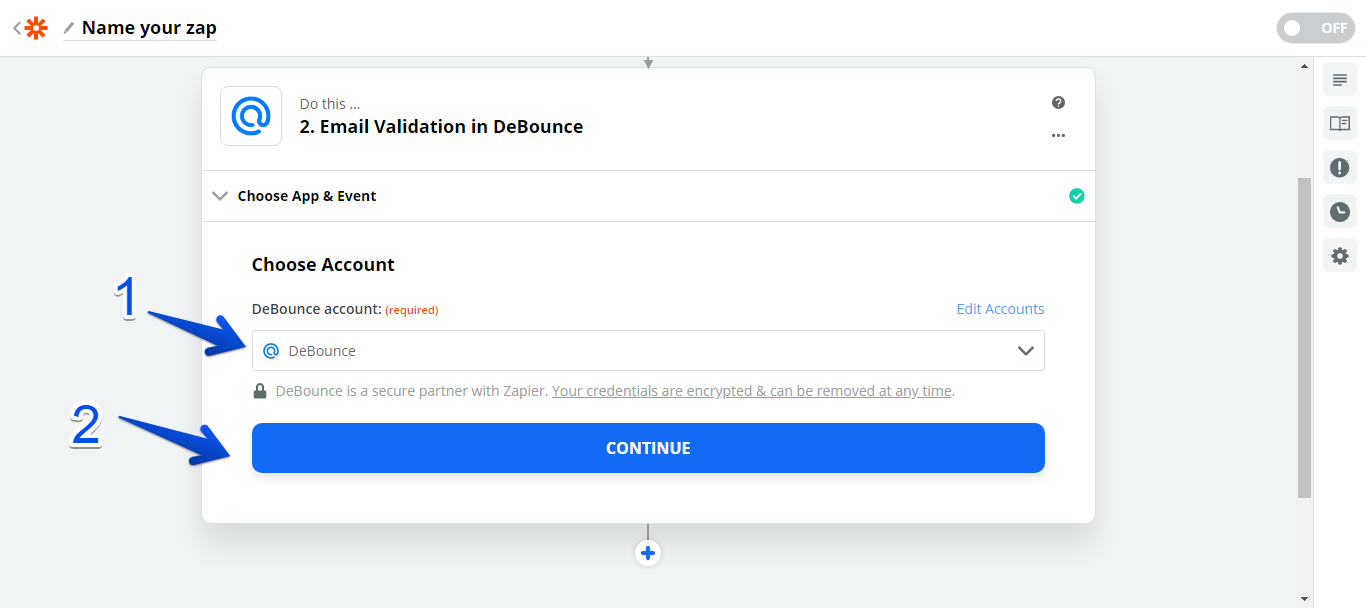
Step 9: Here, the only actionable option will be “Email Validation,” which has been chosen already. Tap “Continue,” followed by “Choose Account.” This will help link your DeBounce account. In the subsequent page, type in your API key – you can generate your API key under the API section in your DeBounce account. Next, select “Yes, Continue.”
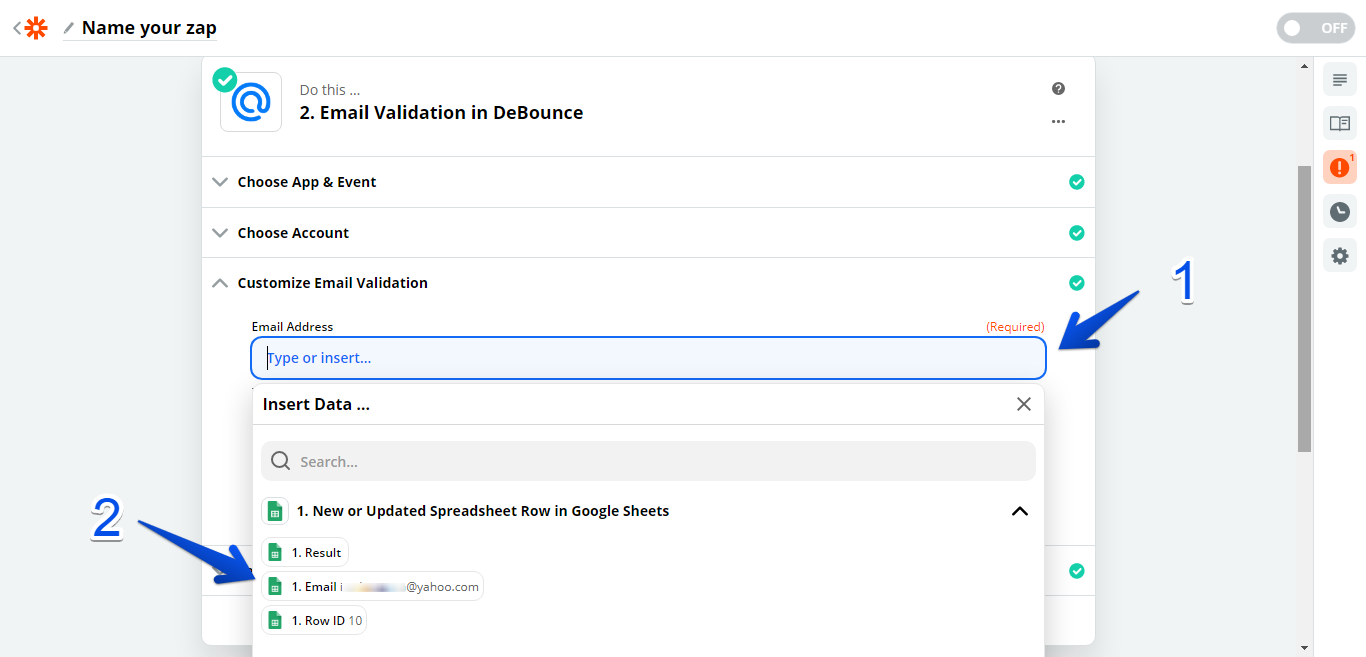
Step 10: At this stage, you have to establish your template. Click on Email Address and select the drop-down icon. Then, choose the column containing the email addresses in your spreadsheet. Afterward, tap “Continue.”
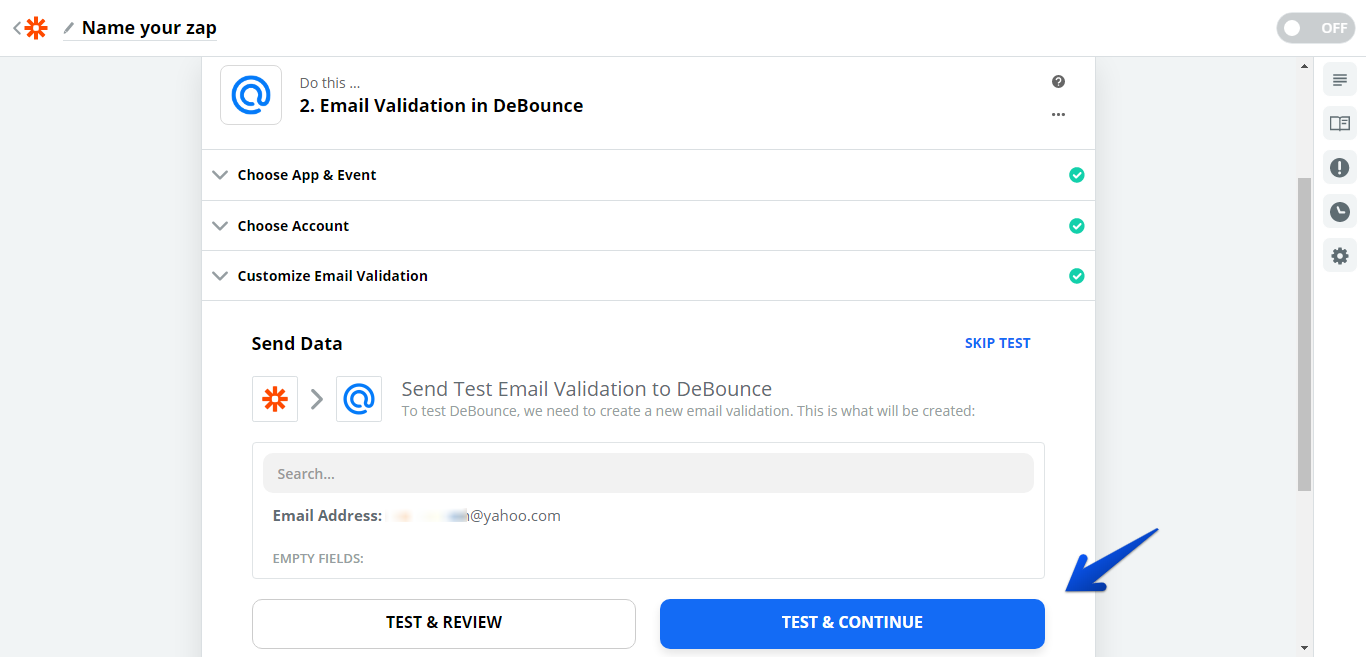
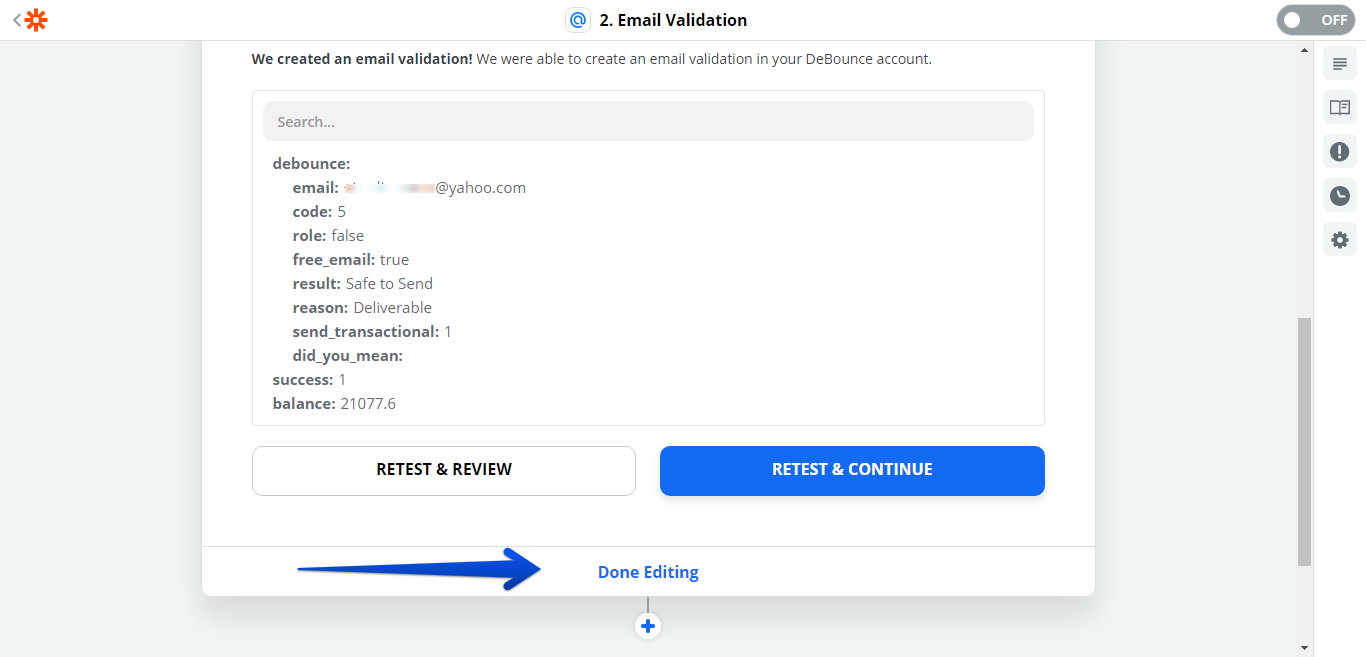
Step 11: Here, before you proceed, the system will display a page to check if the setup is right. Check the main field for an email address. Then click on “TEST & CONTINUE;” The system will test the setup. If everything is correct, a “Test was successful” will come up on the next screen. Also, the outcome of the verification will be shown on the email address, which was verified. If the test passed, tap “Done Editing.”
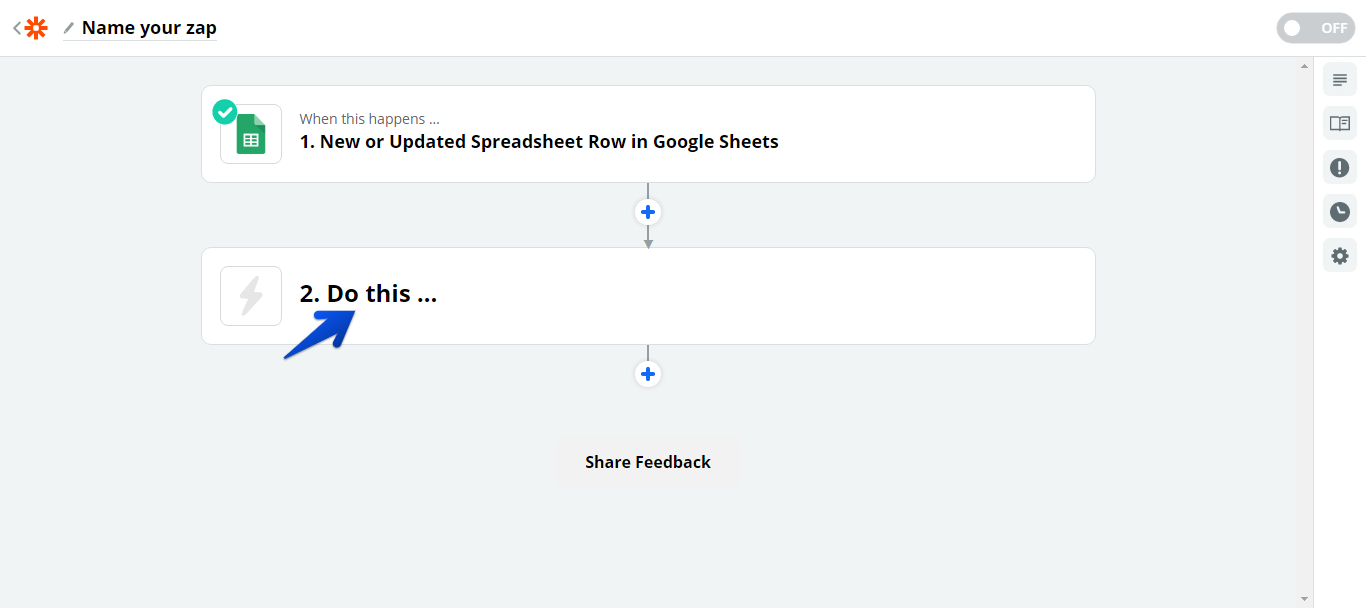
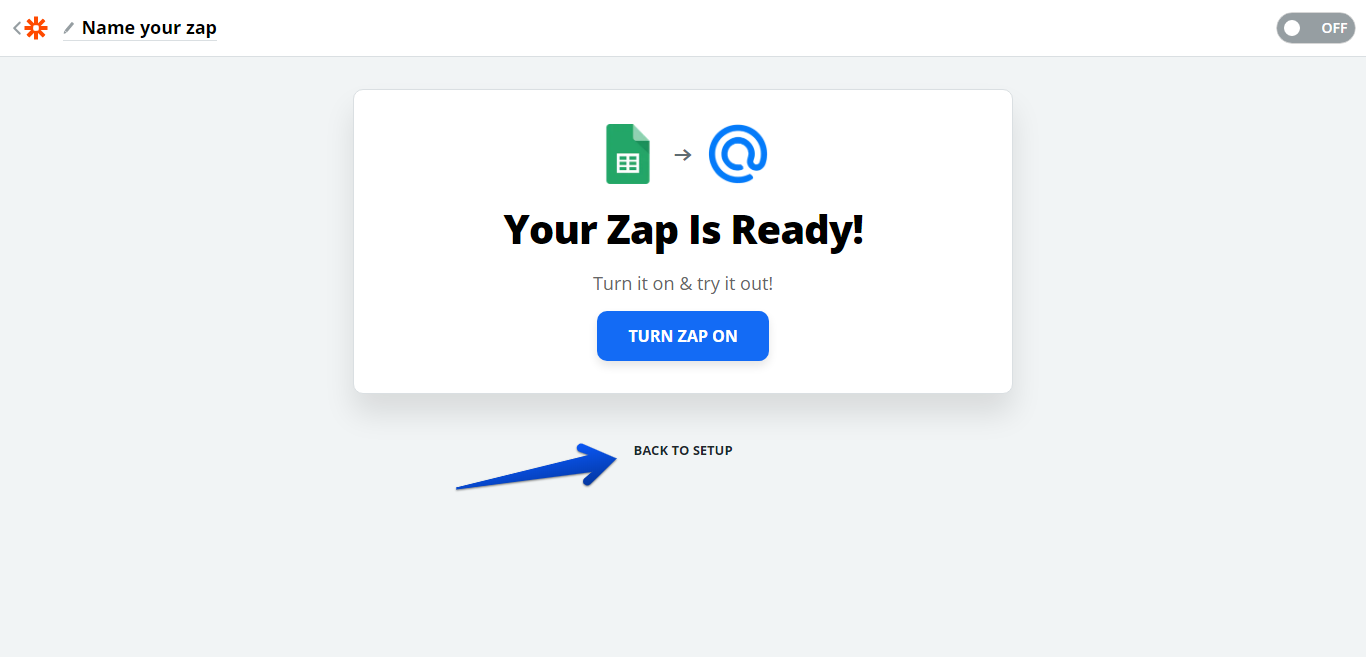
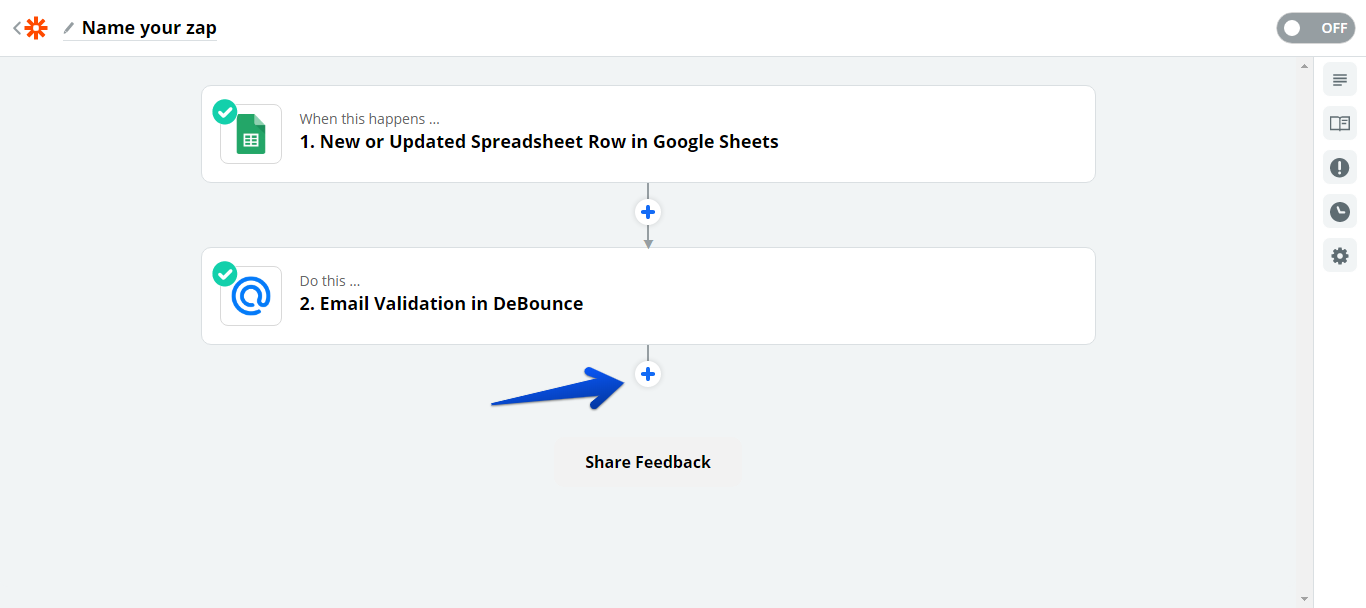
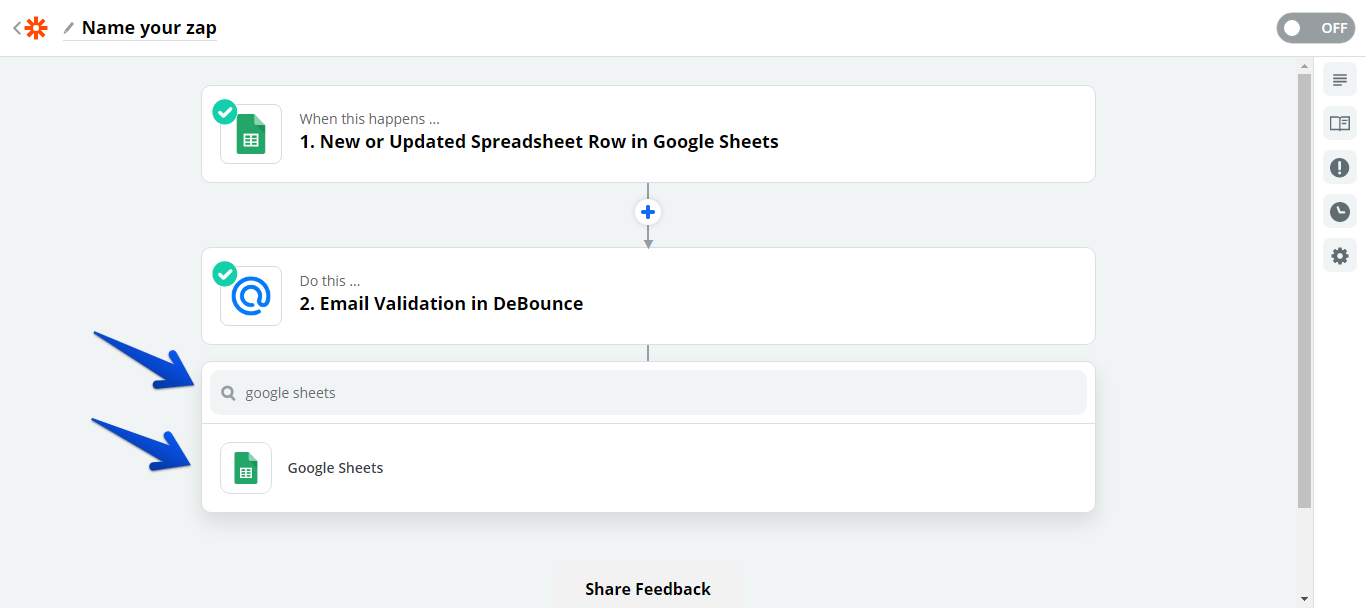
Step 12: The system will ask if you are willing to activate your Zap. Here, we are not ready because we need to engage one more step before our Zap becomes operational. The stage is to return the verification outcomes to the Google Sheet. So click on “BACK TO SETUP” and then move your cursor to the bottom, then tap “+” icon to include a new Action step.
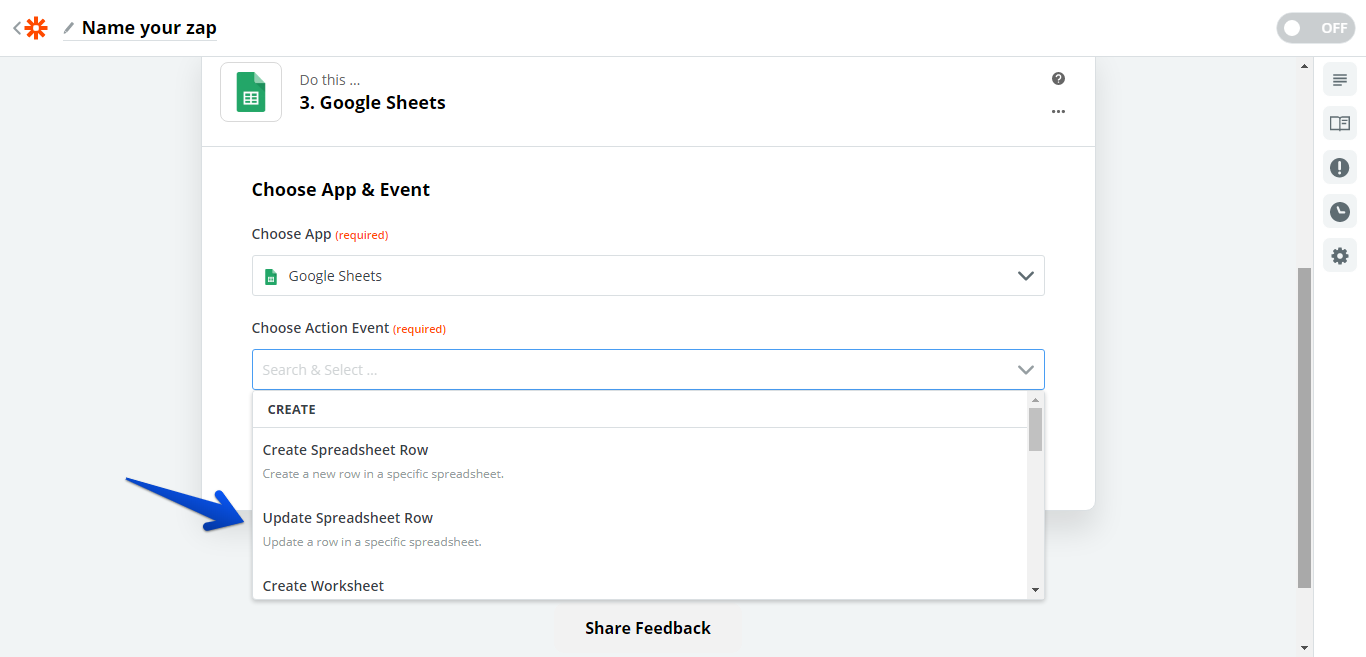
Step 13: Again, you will need to choose an app that will perform the selected action. By now, you will see Google Sheets in your apps. Tap Google Sheets, and click “Update Spreadsheet Row.” Then, tap “Continue.”
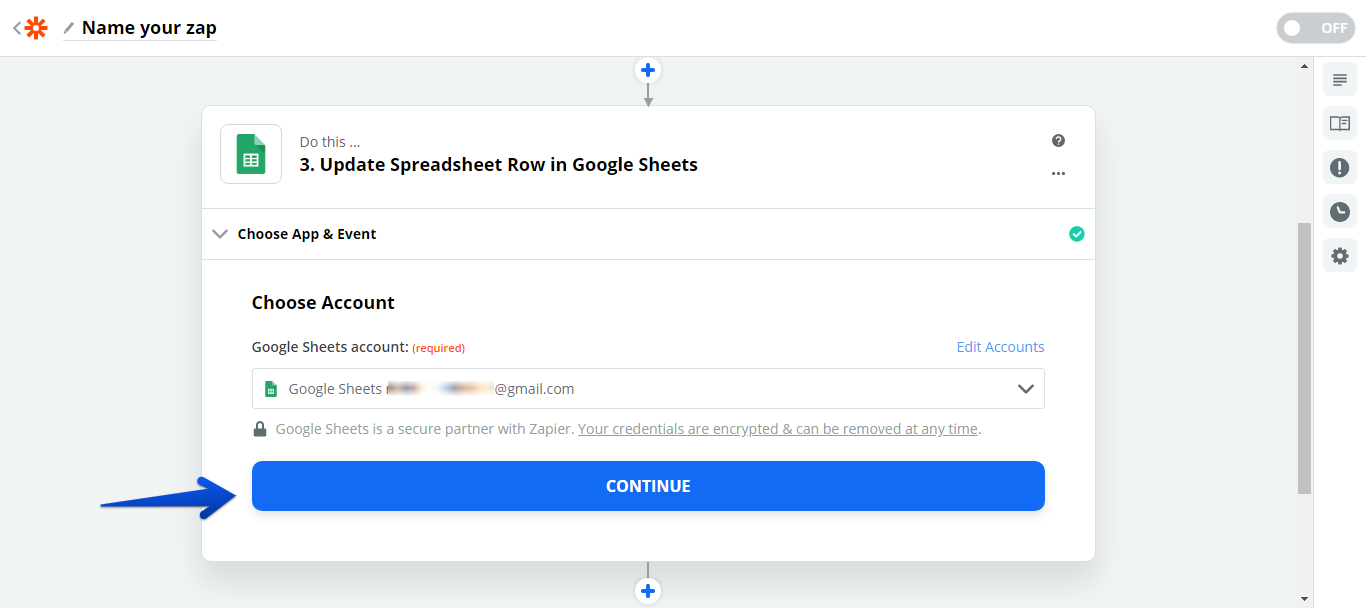
Step 14: Your Google Account would have been selected. Once you notice this, don’t bother to perform the login process again. Instead, select “Continue.”
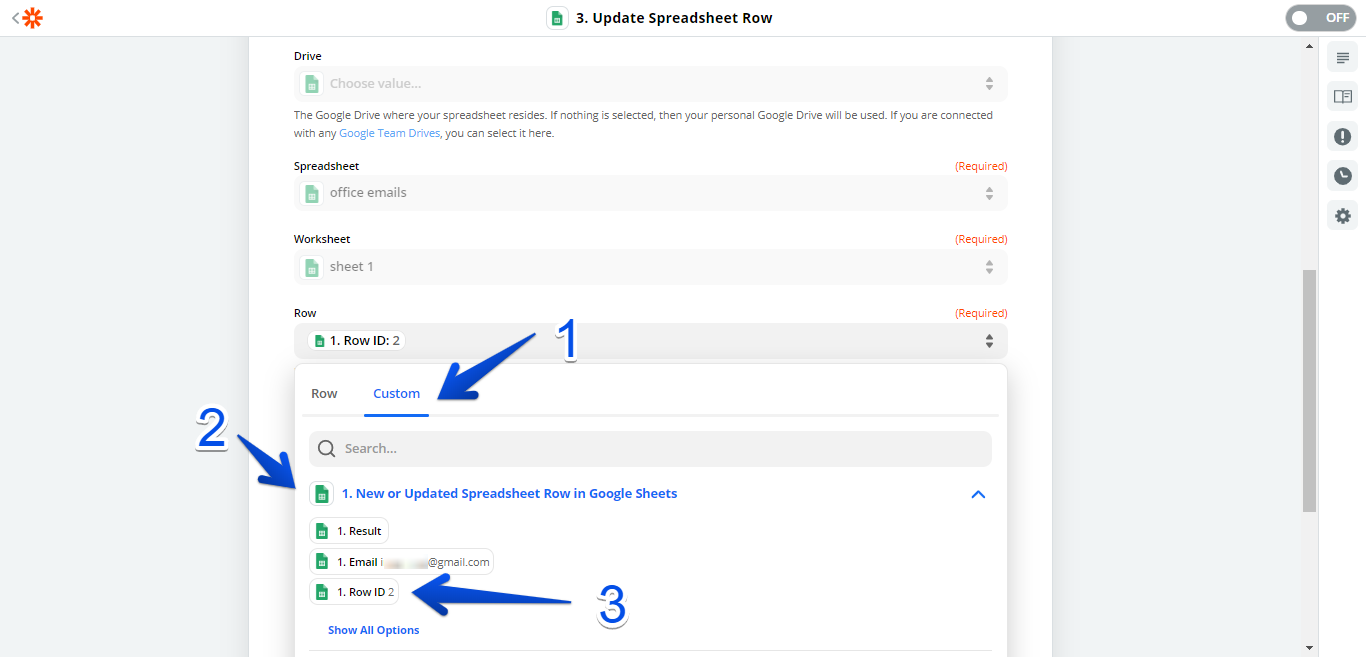
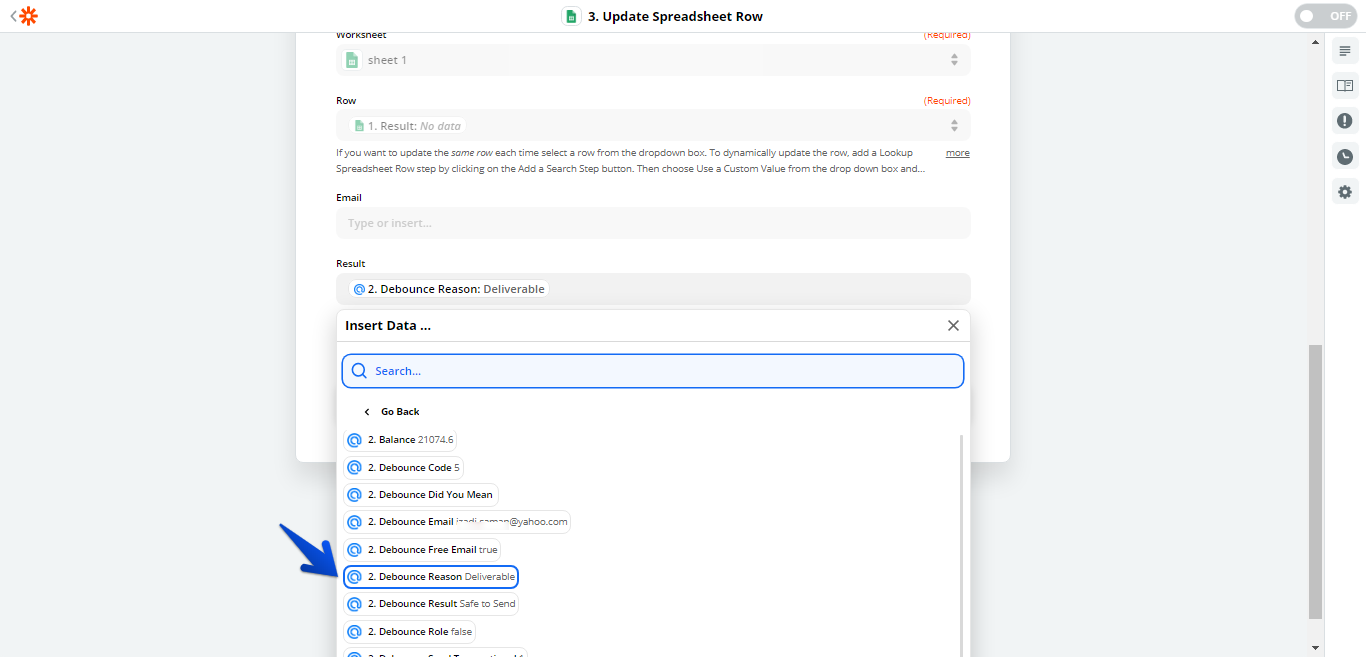
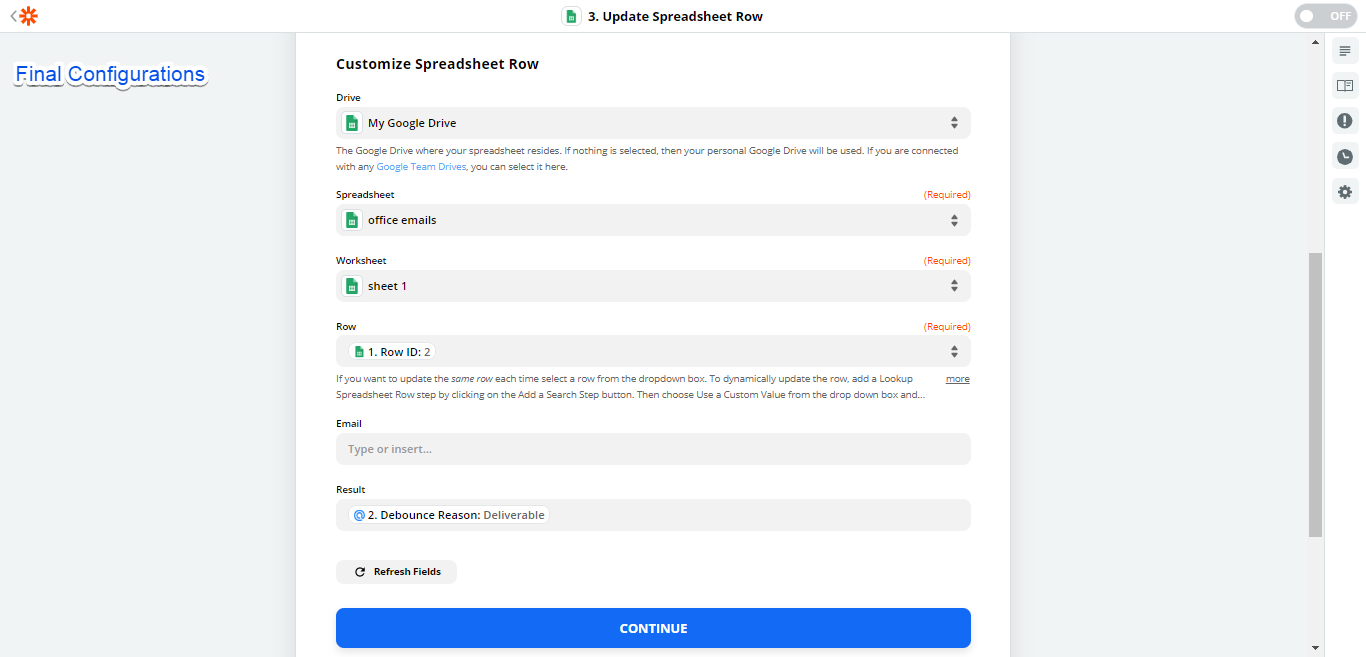
Step 15: Now, as we have explained in step 6, choose the spreadsheet and the worksheet. Afterward, click “Custom” under the Row and tap the drop-down icon under “New or Updated Spreadsheet Row in Google Sheets” and select “Row ID” on the list. Now, scroll down to see the fields which you have developed in your spreadsheets for verification results – remember the Validation Result column which we discussed under “What do you need?” section. From the drop-down menu “Result”, click each field to choose them (your desired validation output – For example DeBounce Reason). Then, tap “Continue.”
Step 16: The system will run a test to check the setup. Afterward, select “Done Editing.”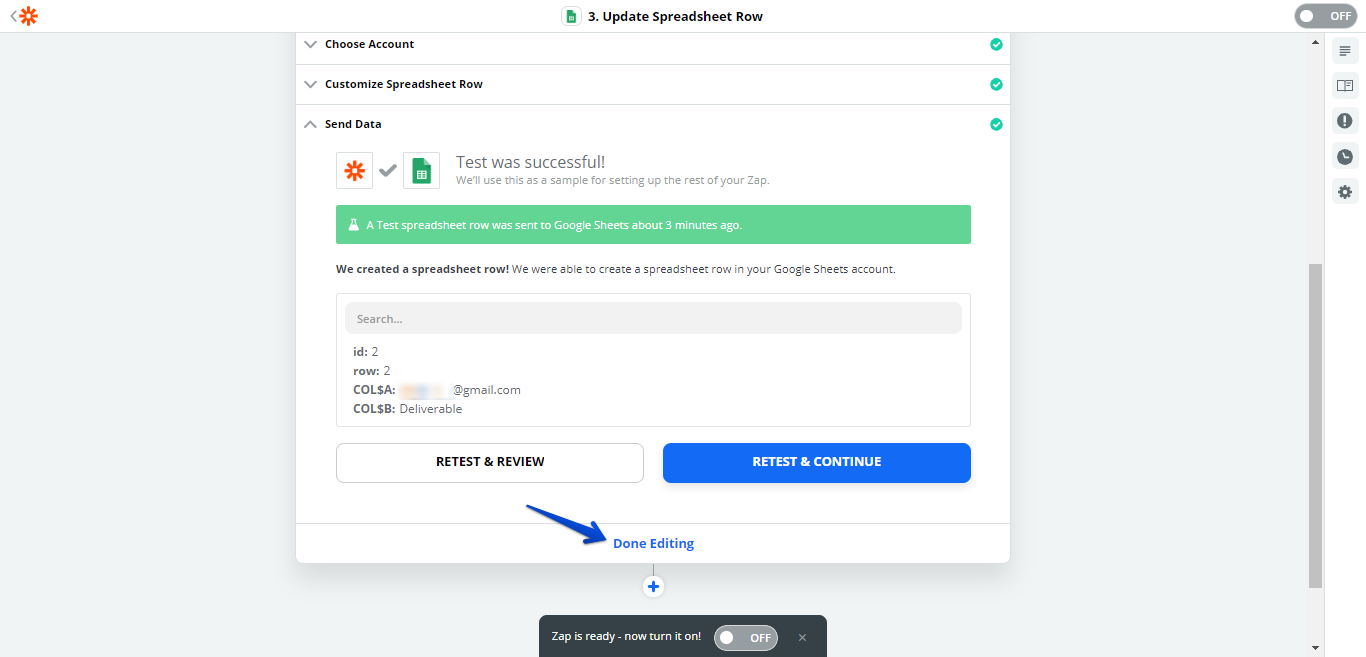
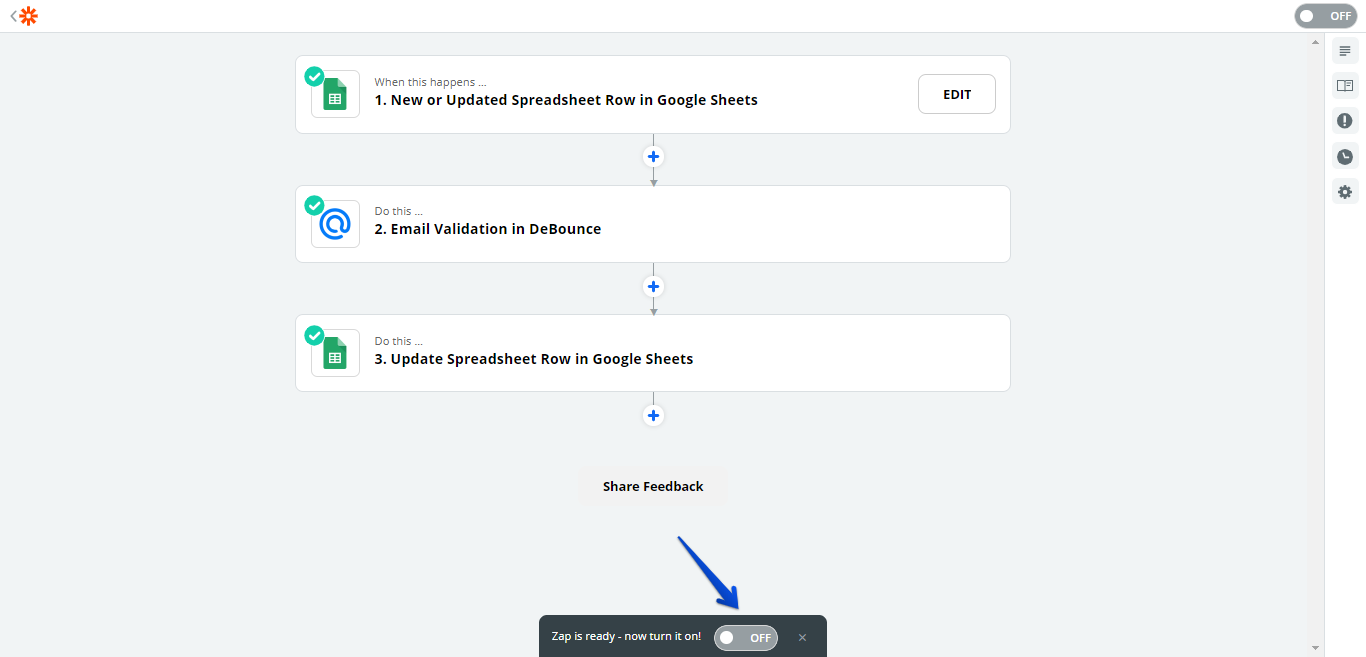
Step 17: At this point, we can activate our Zap. Tap the switch to activate your Zap.
Step 18: Now, perform a manual test to ensure that everything is in place. Visit your spreadsheet and insert a new entry into your Email column. Navigate to your Zapier Dashboard and check to see your present Zap(s). Tap the drop-down menu close to the “ON” button. If no error pops up, then your Zap is working as planned. Now, return to your spreadsheet. By now, the verification results should have been synced back to the intended column and row; check to find out.
Note: The operation explained above is one of the several ways to use a Zapier in collaboration with DeBounce’s email list cleaner. However, the fundamental principles remain the same. Zapier’s library contains more than 1,000 online apps, which means that they are likely to support the CRM or ESP which you are currently using. Check through the longlist of their supported apps and feel free to perform email verification with Zapier.
Be creative while exploring the endless possibilities of Zapier. If you ever encounter any issues, kindly get in touch with our LiveChat support team for proper assistance.
Through Zapier, you can link DeBounce with more than 1,000 web services. Within a few minutes, you can establish automated links known as Zaps without any coding skills. Finally, use Zapier to automate your daily tasks and develop working relationships among apps like never before!