+ |

from
+ |
JS Widget can easily integrate into your ClickFunnels forms and validate your emails prior to form submission.
What do you need before starting?
Here is a step-by-step guide on how to integrate DeBounce into your ClickFunnels forms.
Navigate to https://app.debounce.io/api and create an API key, then copy the public API key.
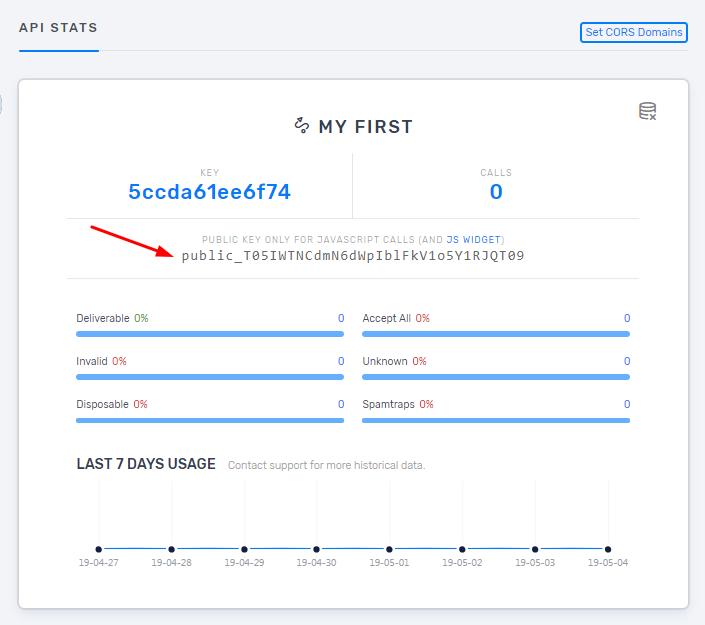
Next, you need to add your domain URL to the approved domains list. This is a security factor that only enables the widget on your specific domain. Click on "CORS Domains" and add your website address. Please note that the CORS URL must follow these rules: 1) It is not sensitive to HTTP and HTTPS; 2) It is sensitive to www and non-www; 3) If your webpage is on a subdomain, you must add the subdomain too; 4) You must enter the root URL of your webpage. Some possible examples: example.com, my.example.com, www.example.com.

Add your public API key into the following code. The integration code is now ready. You only need to add it to your ClickFunnels page.
<script type="text/javascript">
DeBounce_APIKEY = 'YOUR_PUBLIC_API_KEY_HERE';
DeBounce_BlockFreeEmails = 'false'; //Set this value true to block free emails like Gmail.
</script>
<script async type="text/javascript" src="https://cdn.debounce.io/widget/DeBounce.js"></script>
On your ClickFunnels admin account from the Page Edit screen, click “Elements” > “Add Element”. Click “Custom JS/HTML Element” and drag it to your funnel page. It does not matter where you put the code. Then, click the custom element to open the editor. Ensure the “Custom Code Type” field is set to the 3rd Party Embed Code. Next, click “Open Code Editor”.
Copy the DeBounce JS Widget in the Code Editor. To return to your funnel page, close the Code Editor window.
Finally, click “Hide Element” to make the JS element invisible. Your DeBounce widget can now work its magic on your page. You can access hidden elements, edit them or make them visible by clicking “Elements” > “Manage Elements”.
Please note: The JavaScript widget will only validate emails on the preview or live version of the ClickFunnels page, not from the editor screen.