According to 59% of consumers, emails directly affect purchasing decisions. In fact, effective email marketing can get you an ROI of $36 - $42 for every dollar spent. However, to make email marketing work, you must track, monitor, and optimize your emails regularly. This is where the Google Postmaster Tools come into play. The tool enables marketers and business owners to avoid costly mistakes.
Let’s see how this free tool from Google can help your email marketing ROI.
What is Google Postmaster Tools?
First things first. The Google Postmaster Tools are designed to help business owners analyze their email marketing performance on Gmail. The tool helps senders identify problems that might be affecting their deliverability adversely.

To use Google Postmaster Tools, you must connect it to your domain, which we’ll discuss briefly. Once you link the domain, the tool will get to work and start fetching valuable data. Data that can help you improve your email deliverability rates.
The dashboard of Google Postmaster Tools is divided into the following seven sections:
- IP reputation
- Domain reputation
- Feedback loop
- Delivery errors
- Spam complaints
- Emails that pass authentication
- Outbound and inbound encrypted traffic
With the basics out of the way, let’s see how you can connect your domain with Google Postmaster Tools in a few simple steps.
How to Set Up Google Postmaster Tools?
Thankfully, you don’t need to be a technical person to connect your domain with Google Postmaster Tools. However, it’s up to you to outsource this aspect of your business to an expert. Before we get started, it’s important to note that Google Postmaster only allows tracking of emails sent to Gmail addresses. Be that as it may, knowing how Google perceives your emails can give you a good idea of how other email services might see you.
With that out of the way, here’s a step-by-step guide:
Step 1: Start by going to the official Google Postmaster Tools website. Look for the “+” icon at the bottom left of the page.
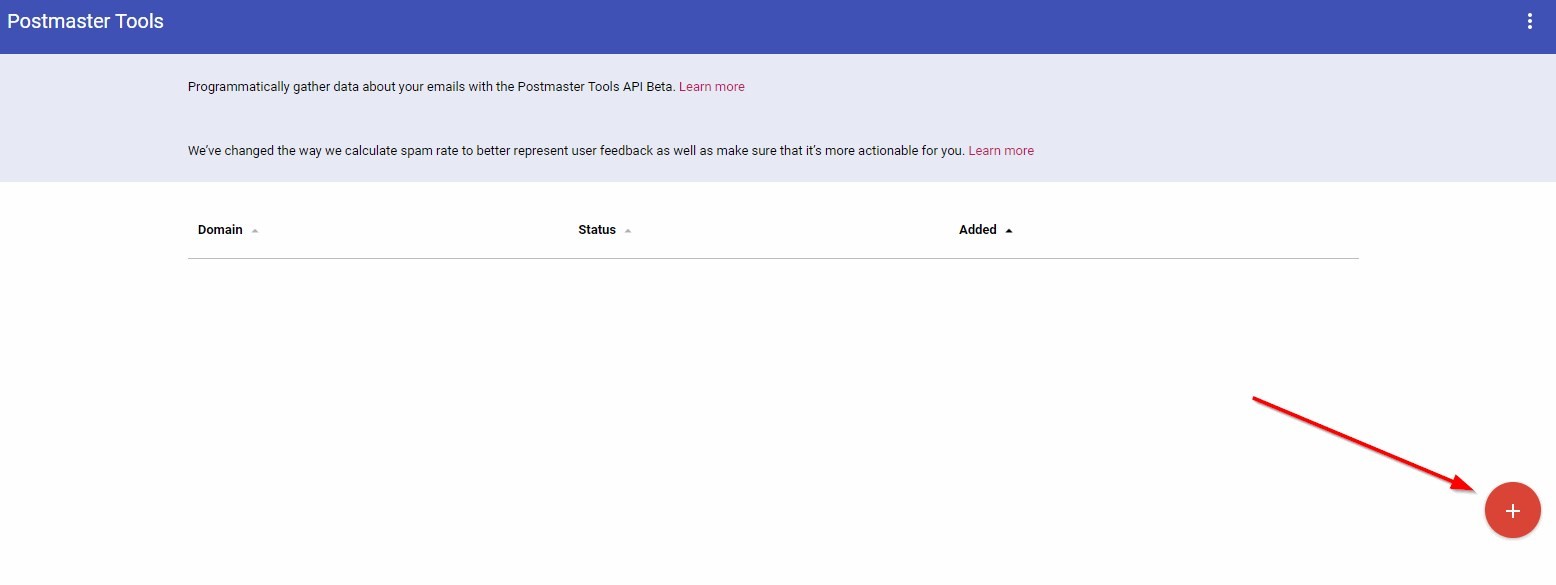
Before clicking that icon, ensure you’re signed in with the Gmail address to which you want to connect your domain.
Step 2: Type in your domain name to connect to Google.
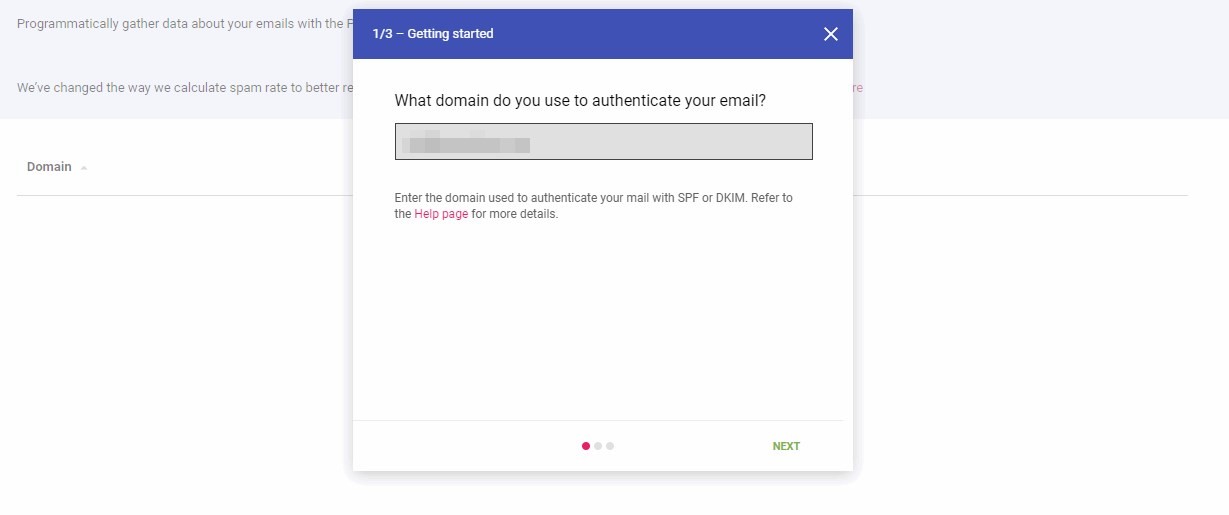
Step 3: As soon as you click next, Google will confirm your domain name ownership.
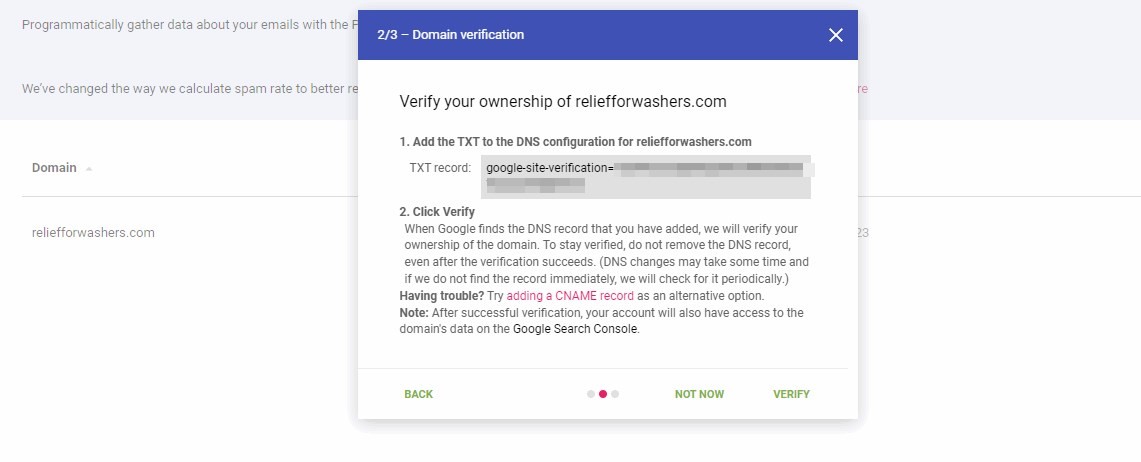
All you need to do is copy the TXT or CNAME records and paste them into your domain’s DNS. If someone else is managing your domain, just send this code and instructions to them.
Step 4: Once you’ve updated your domain's TXT or CNAME record, click “Verify”.
If you’ve followed the above steps correctly, you’ll see the following notification on the next window: “(the domain name) has been added to your verified domains”. This is all you need to do to get Google Postmaster to track your email marketing campaigns. Just click on your new domain and pick a dashboard from the drop-down menu at the top. Note that it may take Google Postmaster a day to track any metrics. So, your dashboards won’t show any data for the first day after signing up. Also, there needs to be decent daily email traffic for the tool to showcase any data.
Expect to see some trackable data and metrics if you send around 100 emails to unique Gmail addresses daily.
How to Effectively Use Google Postmaster Tools?
By now, you have:
- Understood what Google Postmaster Tools are
- Connected your domain to the free tracking tool
Let’s discuss the best ways to utilize this free yet powerful email tracking software.
To Improve Email Deliverability Rates
A good email deliverability rate means your audience gets the message you’re trying to convey. Note that a good deliverability rate is anything above the 95% mark. Anything below that means you need to put your strategy under the microscope.
Google Postmaster Tools helps you identify what’s preventing your emails from reaching your audience’s primary inbox.
Here’s the information you get on your dashboard:
- IP and domain reputation
- Spam reports
- Authentication check report
- Bounced emails
- Technical issues affecting your deliverability
Thanks to the detailed tracking reports by Google Postmaster, you no longer have to worry about identifying what’s affecting your deliverability.
The seven different dashboards provide the data you need to instantly fix the errors and issues and move in the right direction.
To Prevent and Fix Deliverability Errors
Several deliverability errors can prevent your emails from reaching the primary inbox of your email list.
These include:
- The email doesn’t exist
- Auto-reply
- Full mailbox
- Blocked email
- Spam filter
- Incorrect attachment
- Poor sender reputation
- Greylisting
Let’s say you’re working on an email campaign. Everything looks perfect, including your email copy and segmentation strategy. However, your emails aren’t getting as many email opens as expected. You can research different elements of your campaign and see which one’s causing the issue.
But there are two main problems:
- It could take forever
- You could overlook something
With the Postmaster Tools, you can review your deliverability and bounce rates with a few clicks. Not only that, but you also get to know the reasons for low deliverability and high bounce rates. Maybe a few of the receivers reported your emails as suspected spam? Or, it could be authentication issues that caused a decline in the performance. The Google Postmaster Tools gives you the information you need to optimize your campaign for better performance.
To Monitor Your IP and Domain Reputation
A good sender reputation translates to a better email deliverability rate. No matter how well-crafted your emails are, if your reputation isn’t up to the mark, they’ll keep landing in the spam folder. But how do you ensure your sender reputation isn’t causing any deliverability issues?
The IP and Domain reputation dashboards give you the data you need to know exactly that. But why do Google Postmaster Tools have two different dashboards for these?
For mainly two reasons:
- Shared IP addresses share each others’ reputations. If you’re sharing your IP, you may pay for their mistakes.
- It could also be because you want to use and track two different subdomains. For instance, one for transnational emails and the other for promotional ones.
Google Postmaster Tools helps you gauge your reputation through an easy-to-read graph. The tool generates your reputation score and puts it into one of the following four groups:
High Reputation
A high reputation score means your emails are most likely to end up in the primary inbox of your recipients. It means you follow email marketing best practices and will be rewarded accordingly.
Medium Reputation
If your sender reputation is medium, you may have used a spammy tactic in the past, which could affect your deliverability a bit. However, overall, your sender reputation is good enough to land most of the emails in the primary inbox.
Low Reputation
Low sender reputation is where you need to rethink your strategies and do some damage control. Unfortunately, low-reputation mailers are classified as spammers, so your deliverability will be very poor if you’re in this category.
Bad Reputation
Bad sender reputation puts you on the blacklist. You get this reputation due to sending huge volumes of spam emails. To put you in one of these categories, Google looks at the following factors:
- Spam reports
- A super low engagement rate (Opens and clicks)
- Sending emails to expired or invalid addresses
Ways to Improve Your Sender Reputation
- Start by tracking and optimizing your spam rate
- Use personalization and segmentation to improve engagement
- Clean and validate your list
- Track non-engaged users and remove them from your list
- Consider warming your IP again
To Keep Your Spam Rate Low
There’s nothing worse for your email deliverability rate than a high spam rate. Google’s spam rate dashboard lets you know what you should do if your spam rate is low. So, pay attention to what the tool has to say.
Possible implications of a high spam rate are:
- Damage to your sender's reputation
- Problems with SMTP
As a rule of thumb, try to keep your Google Postmaster Tools spam rate below 0.1%.
If it's below that, the tool will round it off to 0%. The most important metric to consider here is how many recipients report your emails as suspected spam. You can minimize these reports by making it easy for users to unsubscribe. People usually report an email when they don’t want to hear from you.
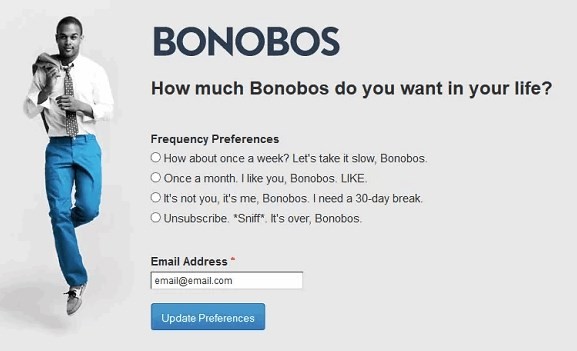
Give them a clear choice by implementing the following best practices:
- Put clear unsubscribe links in your emails
- Make the unsubscribe list stand out (For instance, use a different-colored button)
- Give recipients control over what type of emails they should receive from you
Here’s an example from Bonobos:
Lastly, make sure you don’t send unsolicited emails. This means getting explicit permission from users before sending them emails. If you’re sending people emails they didn’t sign up for, you’re essentially spamming them.
Note that cold emailing is just another name for spamming in technical terms.
How to Add a User to Google Postmaster
Sign into your Google Postmaster Tools and hover over to the “Manage users” section.
Click on the plus (+) icon at the bottom right of the dashboard and enter the user's email address you want to add.
Next, click “Next”. The user will receive an email with instructions on joining your team on Google Postmaster Tools.
How Can DeBounce Help Your Email Deliverability and Reputation?
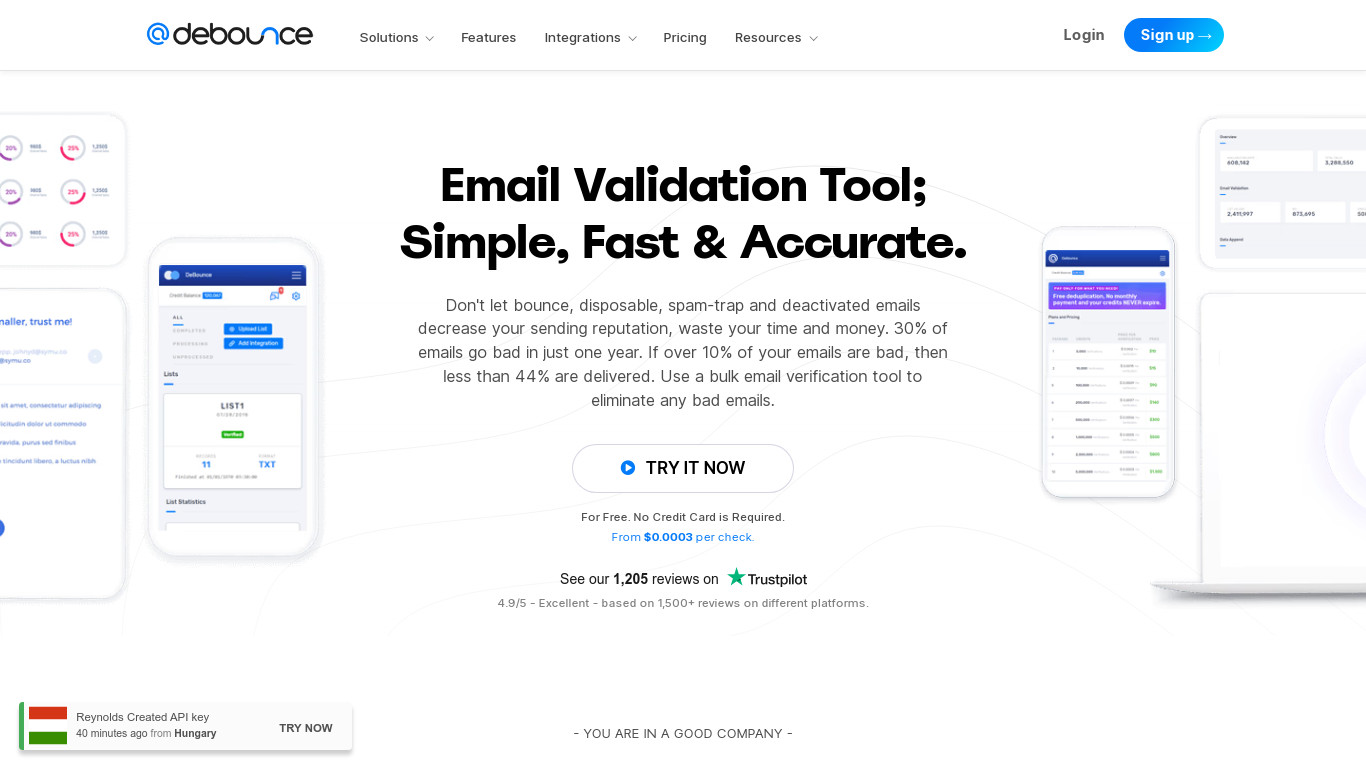
Google Postmaster Tools is excellent for checking email deliverability issues if you send these emails to Gmail accounts. But, the free tool doesn’t fix these issues for you, which is where DeBounce can lend you a hand. DeBounce helps you keep your email list clean and relevant by removing the inactive, temporary, toxic, and incorrect ones. All you need to do is upload your list, and DeBounce will take care of the rest, providing you with a clean email list. And there’s nothing better for email deliverability than a clean, relevant email list.
The cool thing is DeBounce gives you free credits to test its features yourself. Try DeBounce for Free


