Mass emailing is a powerful way to communicate a message to a large audience. The goal could be anything from boosting conversions, a quick follow-up with subscribers, or just plain cold outreach.
But, if you’re reading this, you’re probably wondering how to send mass email in Gmail. In this post, we’ll cover everything you need to know, from how to upload contacts to your Gmail to hitting that send button.Let’s dive in.
The good thing is there isn’t much to learn when sending mass emails with this free Google service. If you’re familiar with sending single emails, the same concept also applies to mass emailing. Here’s a step-by-step process.
1. Add Your Contacts
If you want to mass email a list of prospects regularly, add them as your Gmail contacts. This will make things more manageable and efficient for you.
You can add Gmail contacts in one of two ways:
- Manually
- Through importing from a file
Want to add them manually? Start by clicking on the dotted icon at the top-right corner of your Google page.
Next, click on “Contacts”.
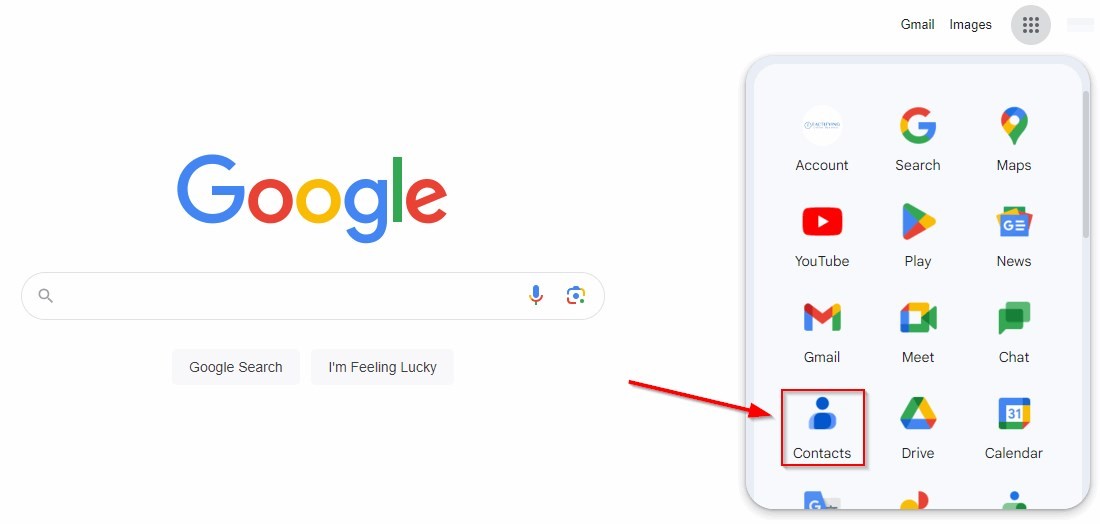
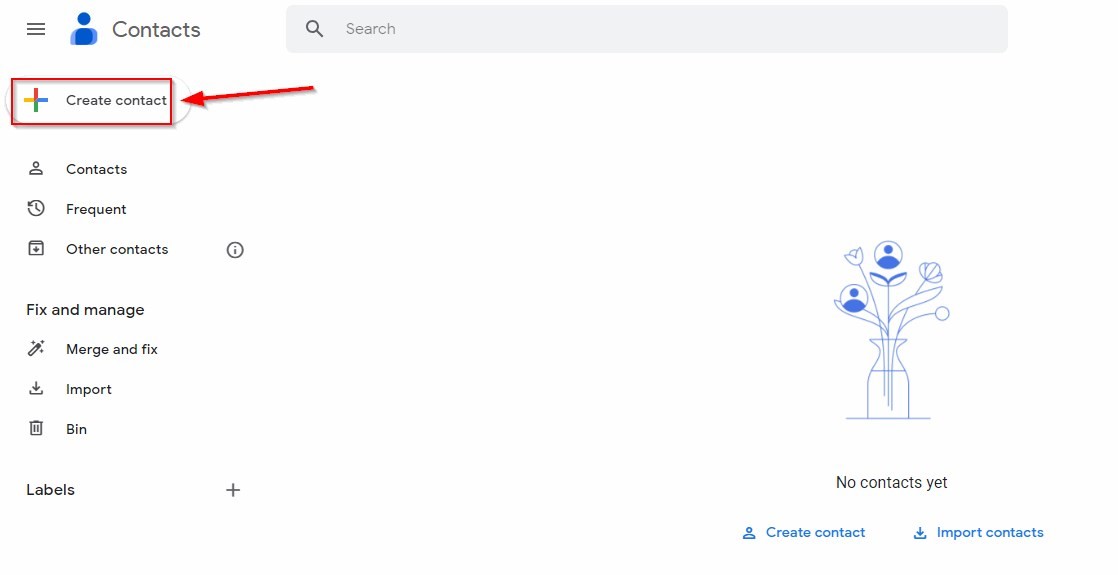
Then, click on “Create Contact” at the top-left corner.
You’ll now have the option to create a single or multiple contacts.
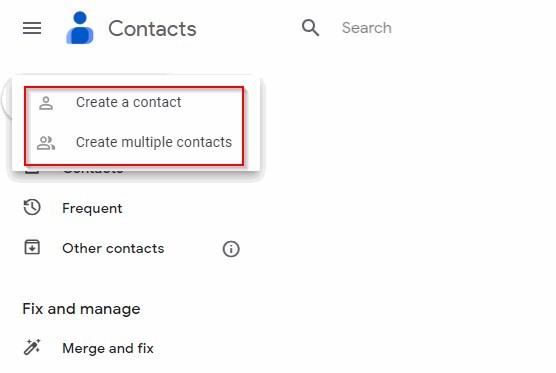
You’ll see here after clicking “Create a Contact.”
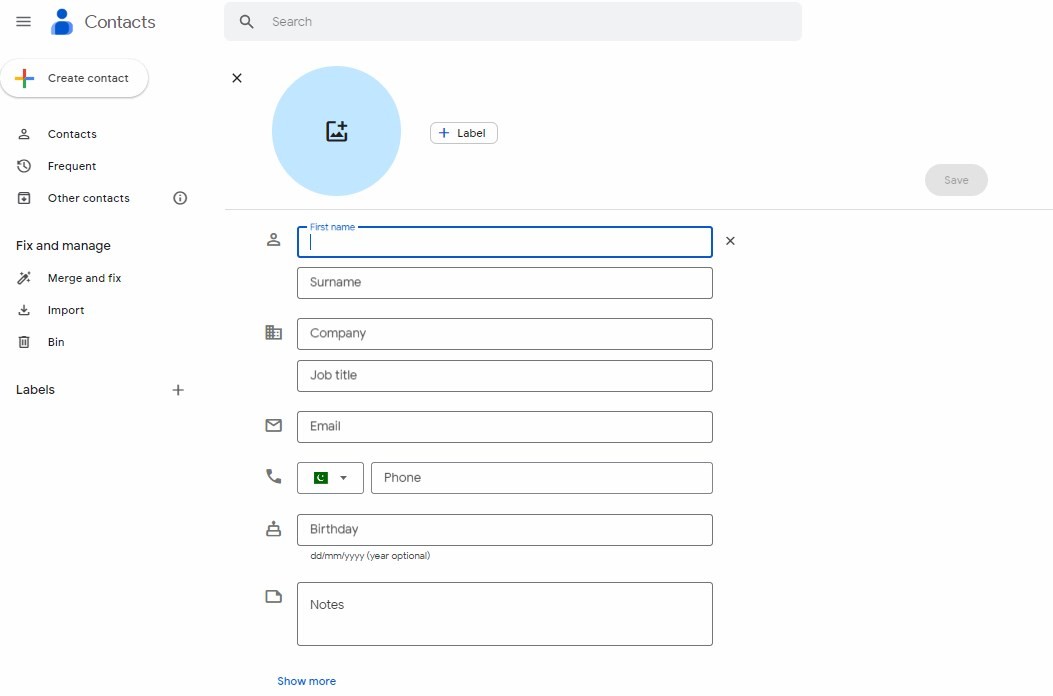
Enter as many details about the contact as possible, including their name, company, birthday, and more.
To add multiple contacts manually, you’ll have to enter their names and email addresses in a row, separated by commas.
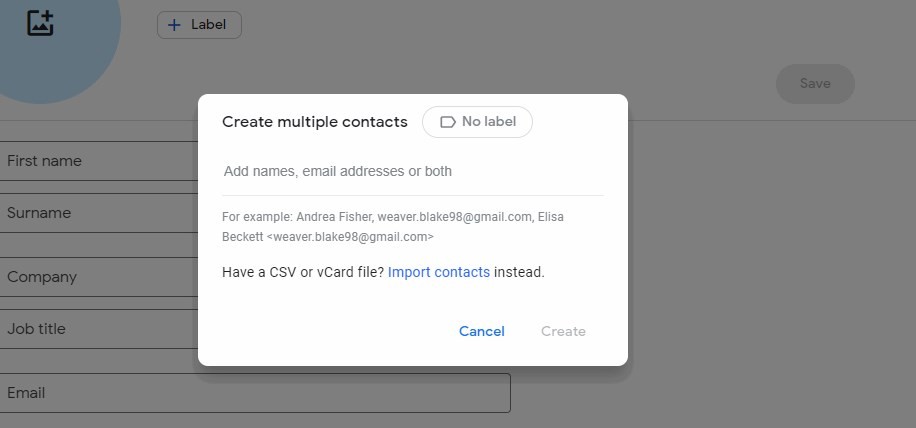
However, a better option would be to upload a list of contacts in a CSV or vCard file, especially if you have a long list of contacts.
To import contacts, you’ll have to select the file.
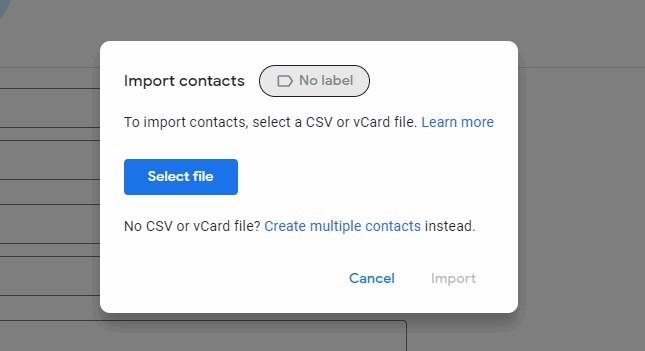
Once the contacts are uploaded, the system will ask you to review and remove any duplicate contacts.
2. Group Your Contacts (Using Labels)
Labels in Gmail help you organize your email marketing campaigns. They let you categorize and group specific contacts together. To the bottom-left of your “Contacts” page, there should be an option to create new labels.
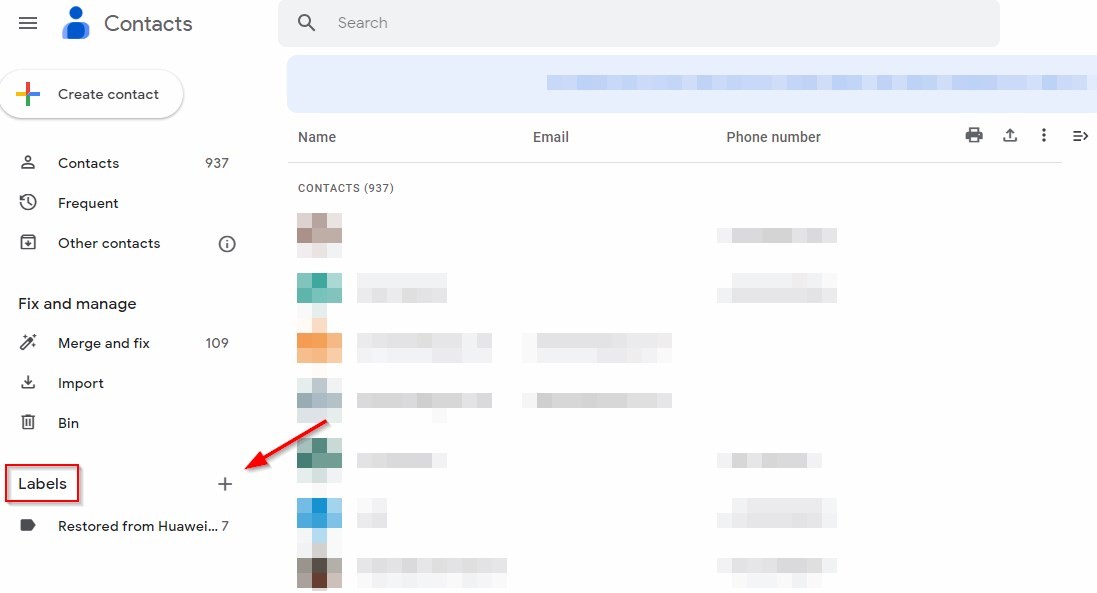
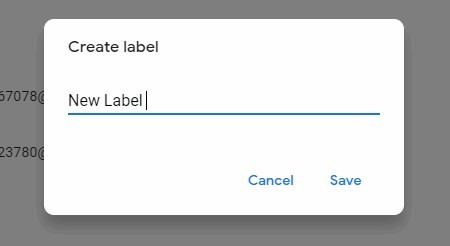
Once you click the “+” icon, Google will ask you to name your new label.
Let’s name it “New Label”.
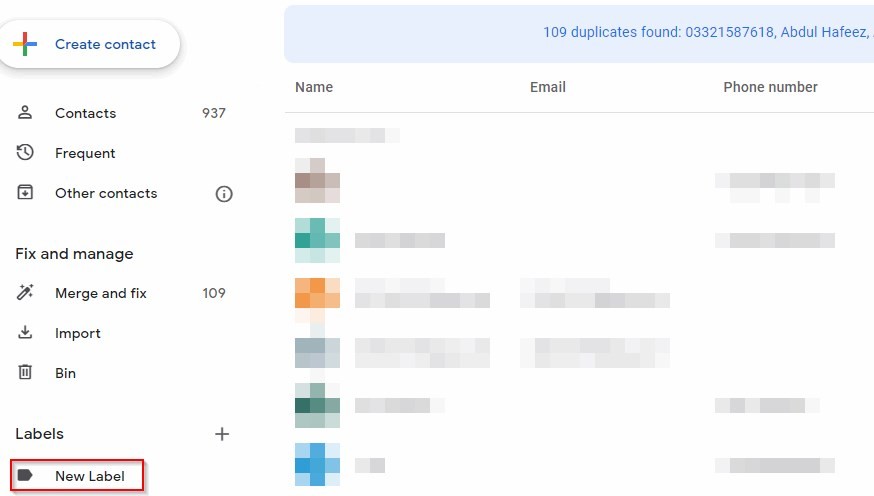
You can see your saved labels at the bottom-left corner of the contacts page.
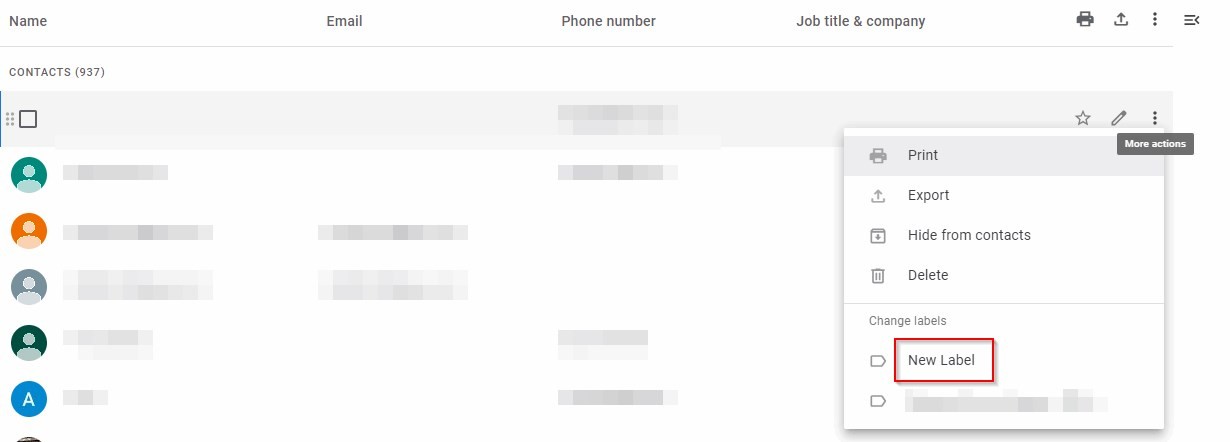
The next step would be to assign relevant contacts to your new label. To assign a contact to the label, click on the three vertical dots before it and select the label.
However, what about assigning multiple contacts to a label at once?
Select all the contacts you want to add to a label.
Next, click on the “Manage labels” icon at the top-right corner.
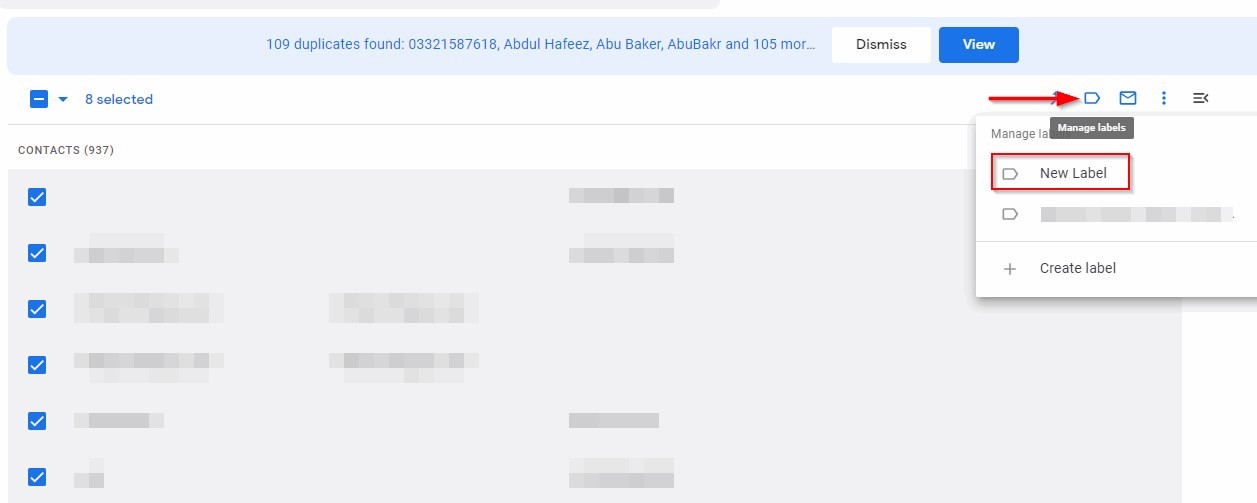
Assign the selected contacts to the label of your choice.
By now, you have:
- Added a list of contacts you want to send mass emails to
- Grouped these contacts into different groups in the form of labels
The next step would be to compose your email.
3. Compose the Email
Send Using Basic Compose
Go to your Gmail dashboard and click on “Compose” in the top-left corner. You can now start writing the email content, which includes the subject line and email body.
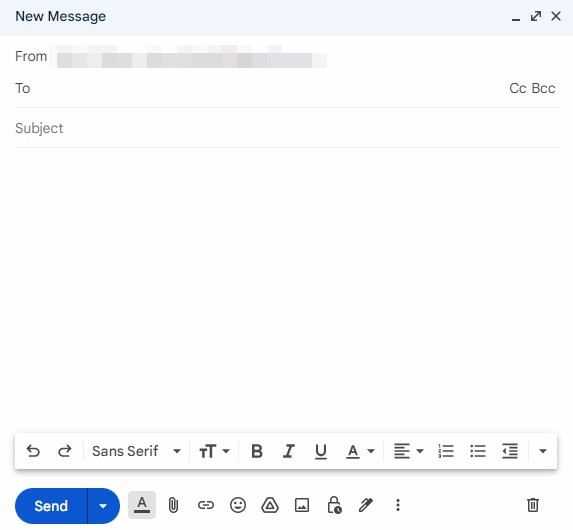
At the bottom, you’ll see a lot of formatting options. You can even change the color of the text. The Gmail editor also lets you add attachments, emojis, and images to your emails. Note that you can also send an email directly from the contacts page. Just click on the “Send email” icon at the top-right corner.

If you’ve composed your email, you probably already know who will be your recipients. One option here is to paste the email addresses of your recipients manually. Of course, the more efficient way to do that is by using a label.
Start typing the label’s name you want to use, and it’ll appear.
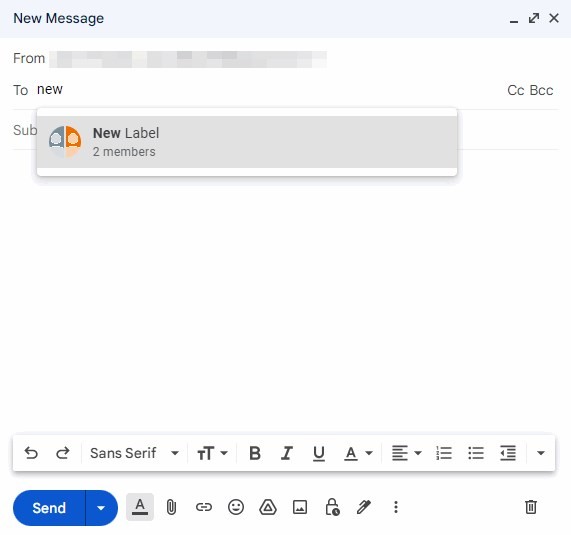
Note that you can always test the email by sending it to yourself. Just enter your email address in the “To” field.
Lastly, you can either send the email immediately or schedule it.
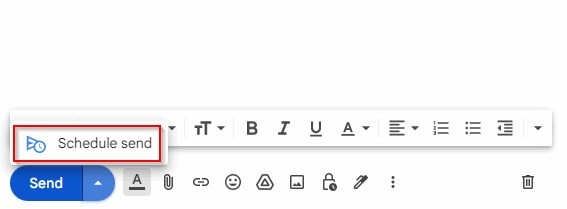
Use BCC Option
You may want to hide the email addresses of your recipients from each other for one simple reason: to protect the privacy of their data. Thankfully, you can hide the email addresses of your recipients in Gmail by using the BCC option.
Here’s how:
Step 1: Start composing the email by clicking the “Compose” button.
Step 2: Instead of using the default “To” option, use the BCC one.
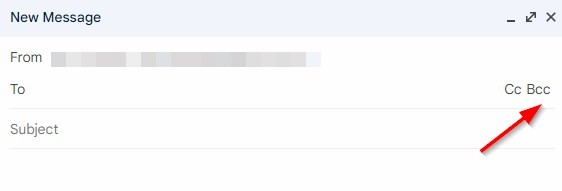
Next, enter the email address of your recipients. Now, when you send a mass email in Gmail, the recipients won’t see the email addresses of other recipients.
Use BCC and Labels
What if you want to use the BCC option to send mass emails in Gmail but don’t want to enter every email manually?
Use Gmail labels! Everything else remains the same, except the step where you add your email recipients.
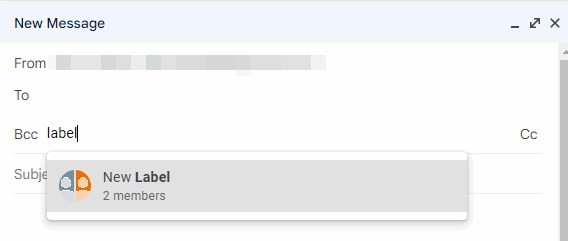
Instead of adding email addresses manually, choose a label.
Using Google Spreadsheets
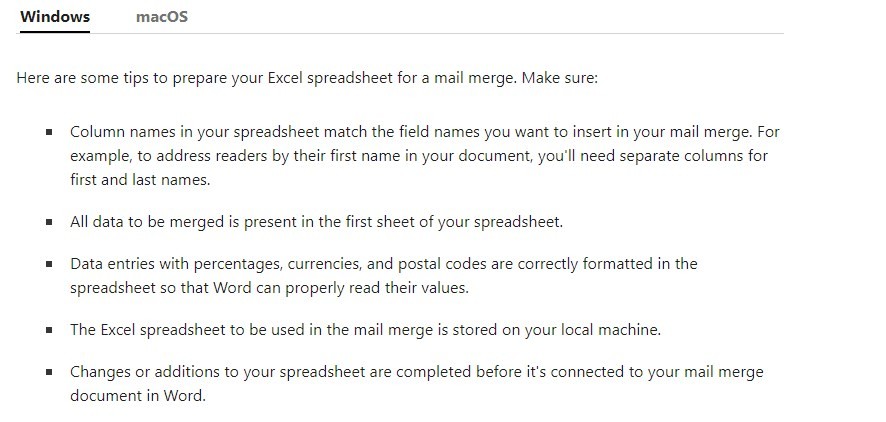
Start by preparing the spreadsheet that contains your contacts. Just make sure to use a separate column for every field in your email campaign.
For instance, the first name of your recipients should have a separate column. Here are the complete instructions on how you can prepare a spreadsheet for mail merge:
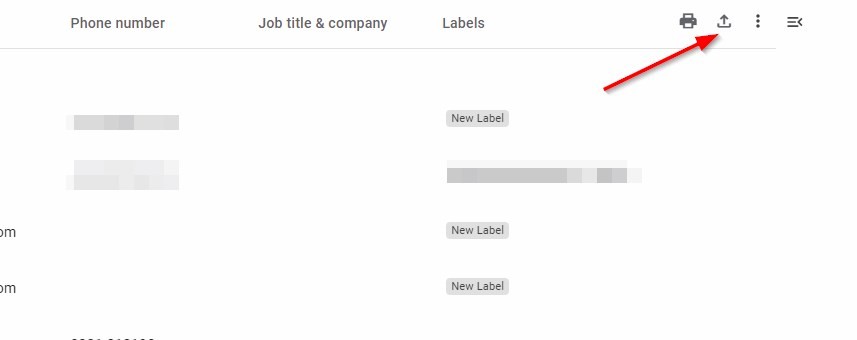
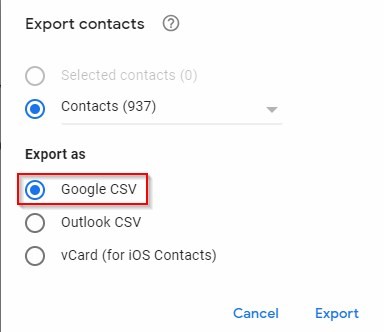
Start by downloading the contacts list from your Gmail in a CSV file.
Download them in a CSV file.
When the file is stored on your computer, upload it as a new Google Spreadsheet.
Then, click on “Extensions” > “Add-ons” > “Get add-ons.”

Quickly search for a free extension named “Mergo - Mail Merge.”
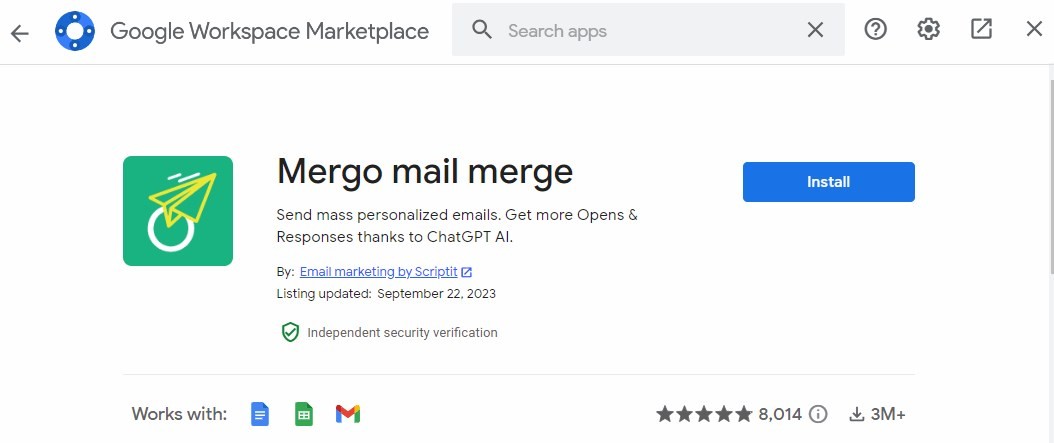
This extension lets you send mass email in Gmail with Google Spreadsheet. Click “Install” and refresh the Google Sheets page. Then, click on the small “<” icon at the bottom right corner.
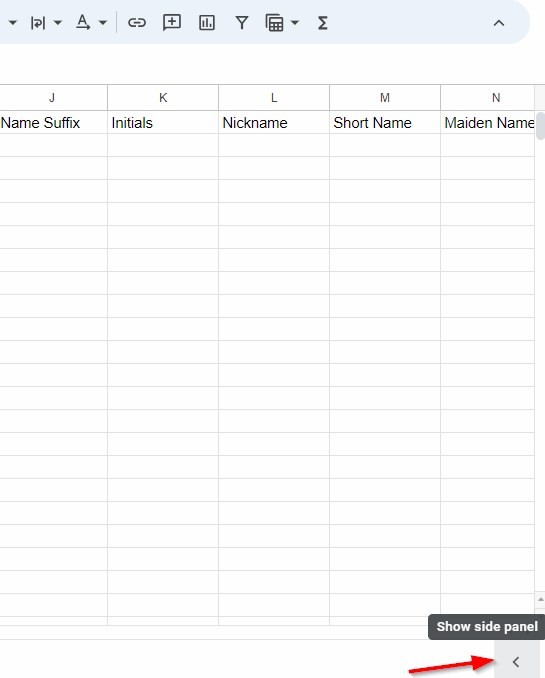
You can now access the Mergo Mail Merge extension from the side panel.
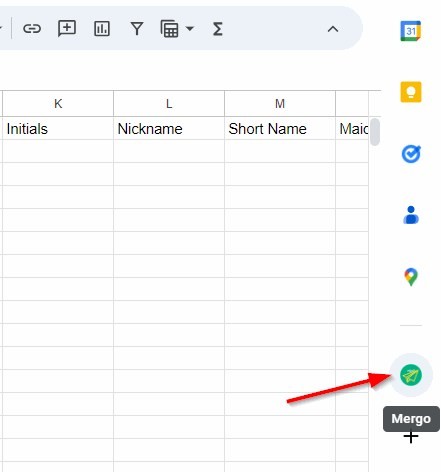
Click on the Mergo icon to open its settings.
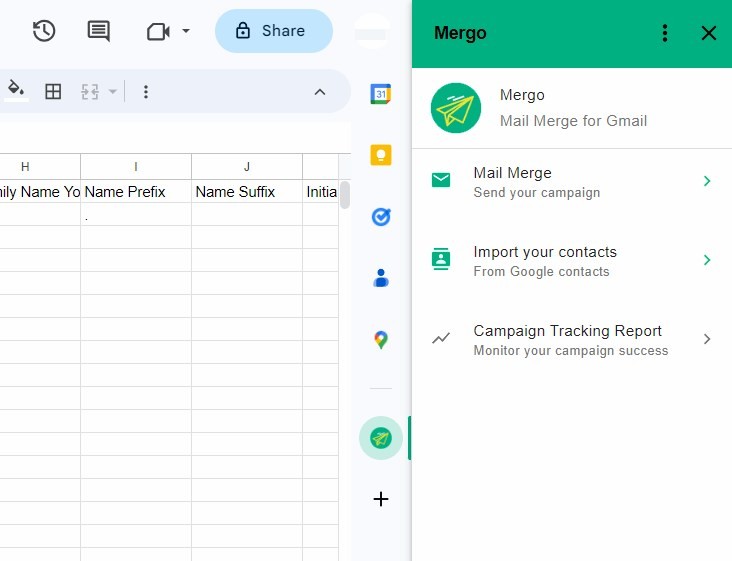
Click on “Mail Merge” to send your first campaign right from Google Sheets.
Here’s what it looks like:
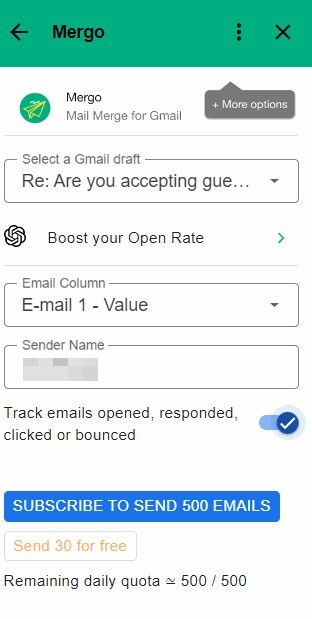
Note that your first campaign with Mergo Mail Merge is free (500 emails). From that point onwards, you will have to subscribe to a paid plan, which is super affordable. Or, continue sending 30 emails per day for free.
With Mergo Mail Merge, you can also attach files to your emails.
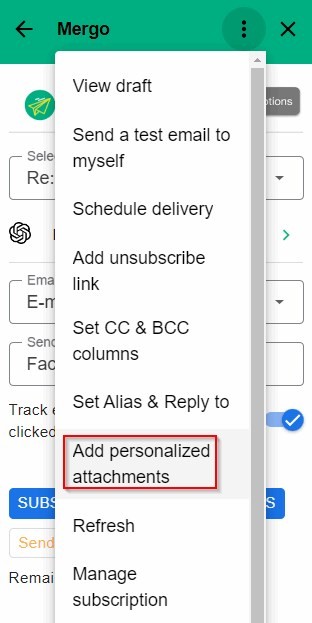
Other notable features of Mergo Mail Merge include:
- Add unsubscribe link
- Send a test email to yourself
- Schedule delivery
- Set a BCC column to hire contact information from recipients
- Set alias and reply to
Limitations of Sending Mass Email in Gmail
Using Gmail for mass emailing has multiple benefits, including:
- Ease of use
- Affordable setup
- Better open rates
- And more
However, there are a few limitations to sending mass emails in Gmail. Let’s briefly look at each to help you prepare for any potential hiccups.
500 Emails/Day Limit
Sending 500 emails/day in Gmail doesn’t cost anything except the Mergo Mail Merge add-on fee, as long as you’re on a free Gmail account. But if you want to send more, there’s an option to upgrade your account to Google Workspace (formerly G Suite). With it, the limits will rise to 2,000 emails/day and 2,000 recipients.
Lack of Personalization
Gmail lets you personalize your emails to some extent. But, it’s not as good as other Email service providers (ESPs) like Brevo and Mailchimp.
Lack of Automation
Gmail also lacks a bit as far as advanced scheduling and automation are concerned, especially when you compare the basic features to dedicated mass email services.
Insufficient Tracking and Analytics
Once you’ve hit the send button in Gmail, tracking and monitoring your engagement is impossible. Gmail lets you send mass email, but it isn’t designed for mass email marketing. The good thing is add-ons like Mergo Mail Merge provide effective tracking features. But it’s not as powerful as top email service providers.
Limited Design Options
Design options may not be a crucial factor when considering an email service provider. But it’s definitely worth considering when you’re looking to engage recipients with visually appealing content. Gmail offers some basic formatting features, but it lacks the design options you get in other ESPs.
Alternative to Sending Mass Email in Gmail
If you’re wondering if there’s a better alternative to sending mass emails in Gmail, the answer is a resounding yes.
Investing in a reliable email marketing service provider (ESP) is the most hassle-free way to manage your email marketing campaigns.
Some good options are:
- Brevo
- Mailgun
- Elastic Email
But before you add your email list to an ESP, consider cleaning it with a tool like DeBounce. It removes invalid, inactive, spam, and temporary emails from your list automatically. This ensures you’re only uploading a list of emails that are likely to engage with your content.
Conclusion
Sending mass emails in Gmail can be daunting at first, especially if you don’t know email marketing rules. A simple mistake can render your campaign ineffective or damage your reputation as a sender. In this guide, we walked you through the step-by-step process of sending mass emails in Gmail safely and effectively.
Here’s a quick recap:
- Add your contacts to your Gmail account
- Create labels to group your contacts
- Hide recipient information by using the BCC recipient field
- Hit send or schedule the email for later
To send emails to a list of contacts in a spreadsheet, you can use the Mergo Mail Merge add-on.


